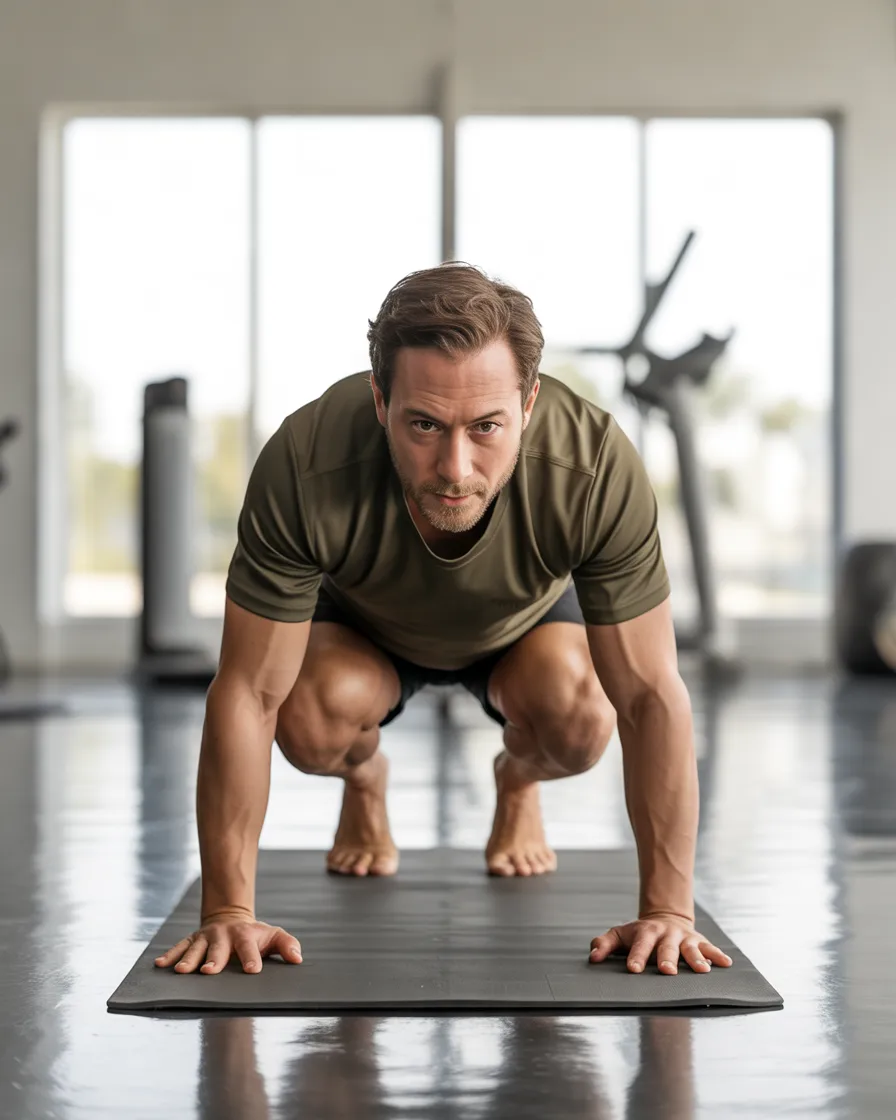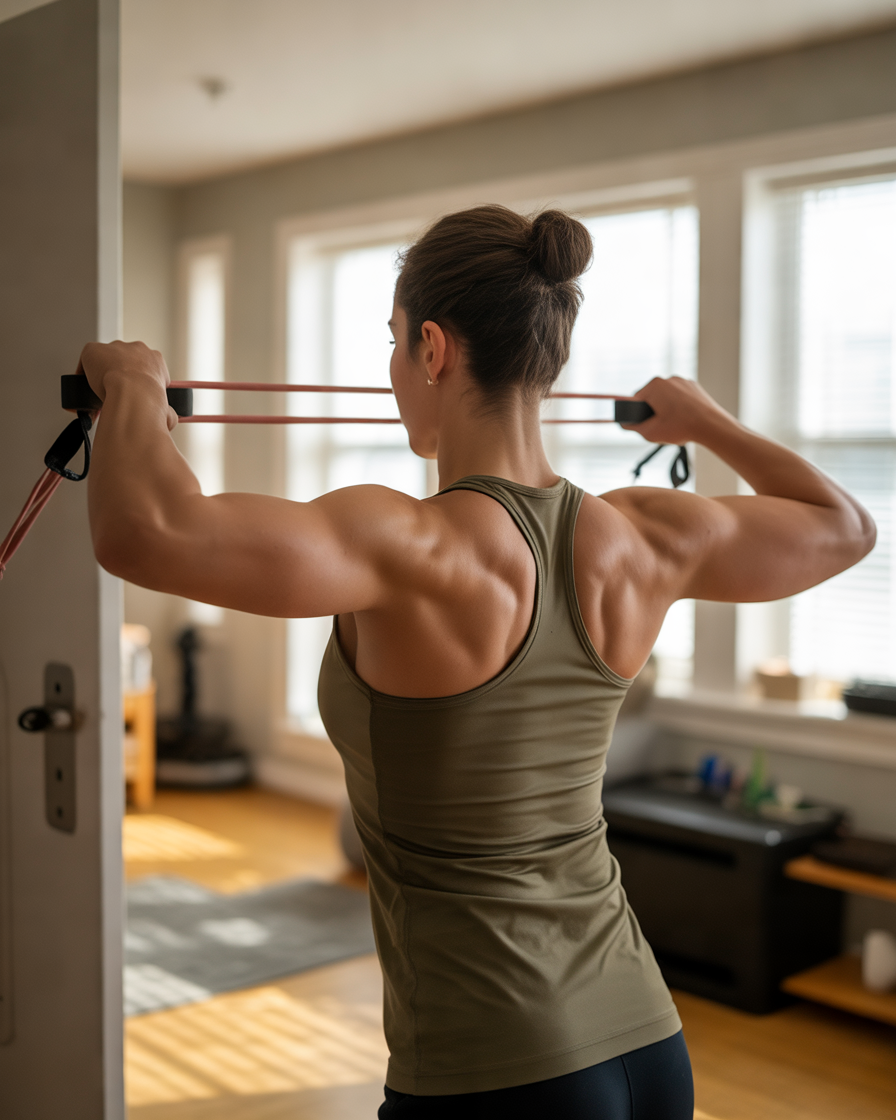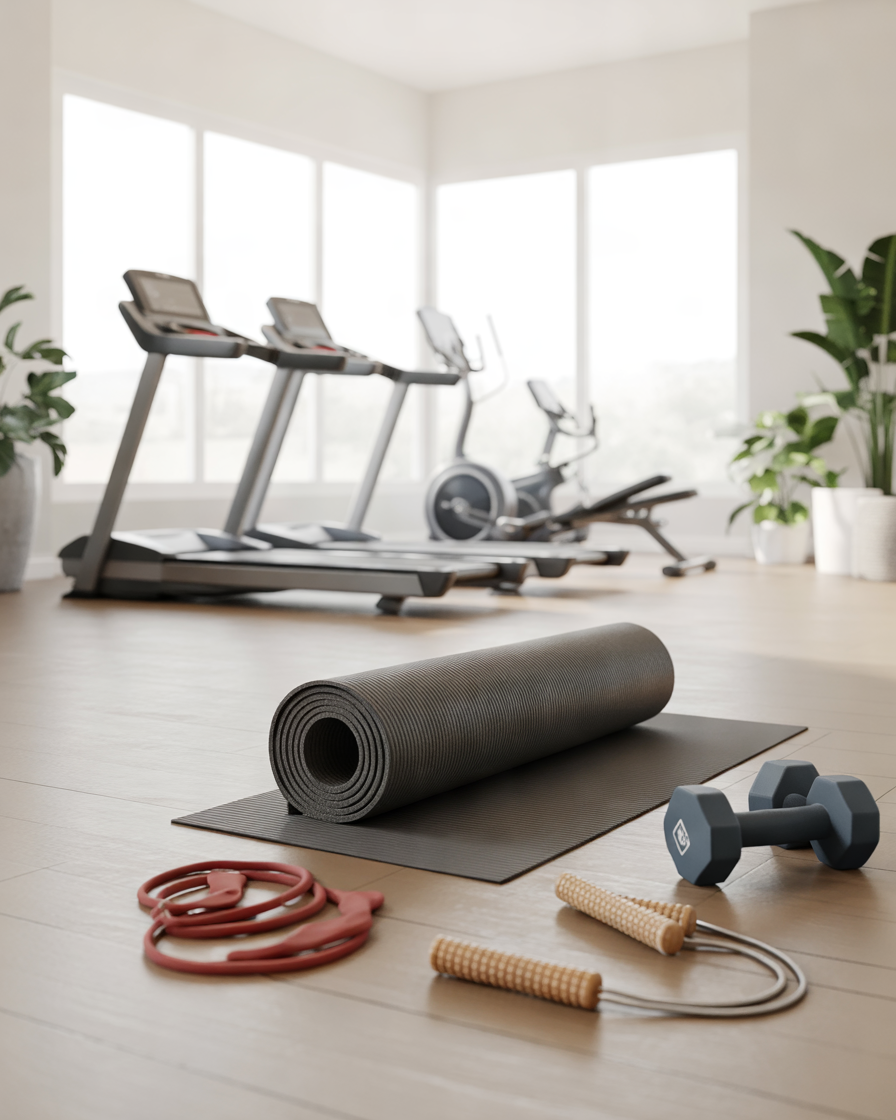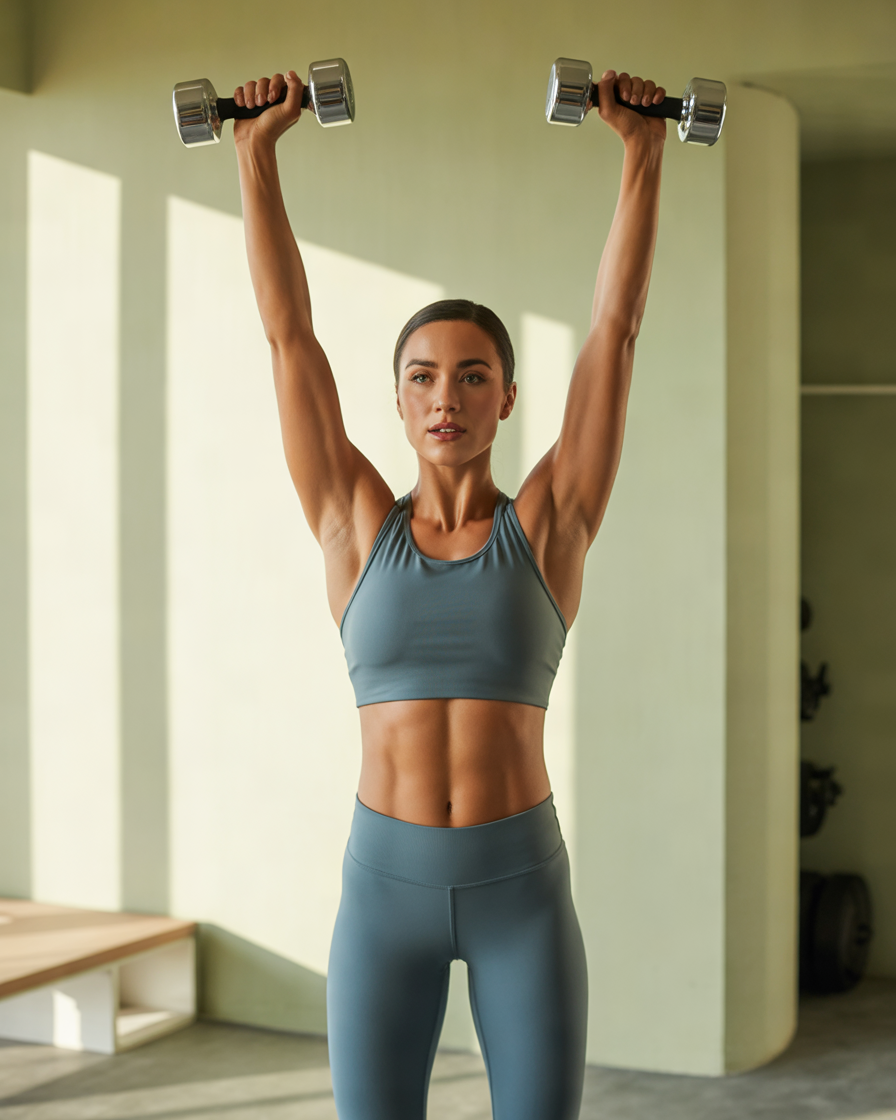
You do not need a gym membership, expensive machines, or a complete set of dumbbells to start building a stronger back. With a little floor space and a few household items, you can create a practical back workout at home that fits your schedule, fitness level, and personal goals.
Your back contains several muscle groups that work together to support your upper body, control movement, and help you perform everyday activities. These include the latissimus dorsi, which contributes to pulling movements; the trapezius and rhomboids, which help control the shoulder blades; and the muscles along your spine, which help maintain trunk stability.
Training these muscles can improve strength, muscular endurance, and your ability to perform activities such as carrying groceries, lifting household items, and maintaining control during other exercises. A balanced routine should also train your glutes and core because they contribute to overall trunk stability.
The good news is that you can train your back using bodyweight exercises, resistance bands, water bottles, or a securely packed backpack. You can even begin with gentle movements before progressing to more challenging exercises.
In this guide, you will learn 10 back exercises at home, including how to perform each movement, how many repetitions to try, who may benefit from it, and what to watch out for. You will also find practical workout plans and individual image ideas to help illustrate every exercise for your health and wellness website.
The goal is not to complete every exercise at maximum intensity. It is to learn good movement patterns, choose an appropriate level of resistance, and build a routine you can maintain consistently.
How to Prepare for a Safe and Effective Home Back Workout
Before starting, clear enough space to move your arms and legs comfortably. A nonslip exercise mat is helpful for floor-based movements, while a sturdy chair or bench can support certain exercises.
Warm up for approximately five minutes by walking around your home, gently rolling your shoulders, moving your arms, and practising a few comfortable hip hinges. The warm-up should make you feel ready to exercise rather than tired.
Choose a resistance level that allows you to control every repetition without swinging your body or holding your breath. Beginners can start with one set of each exercise and gradually work toward two or three sets as their strength and technique improve. General adult physical activity guidance recommends muscle-strengthening activities at least two days per week; the appropriate workload depends on your abilities and goals. (CDC)
Important safety note: This routine is intended for general fitness, not as a treatment for a back injury or an unexplained pain condition. If you have persistent back pain, have recently undergone surgery, or are recovering from an injury, seek guidance from an appropriate healthcare professional before starting or modifying a strength program. Stop any movement that causes sharp or worsening pain.
1. Bent-Over Backpack Rows for Building Upper Back Strength at Home
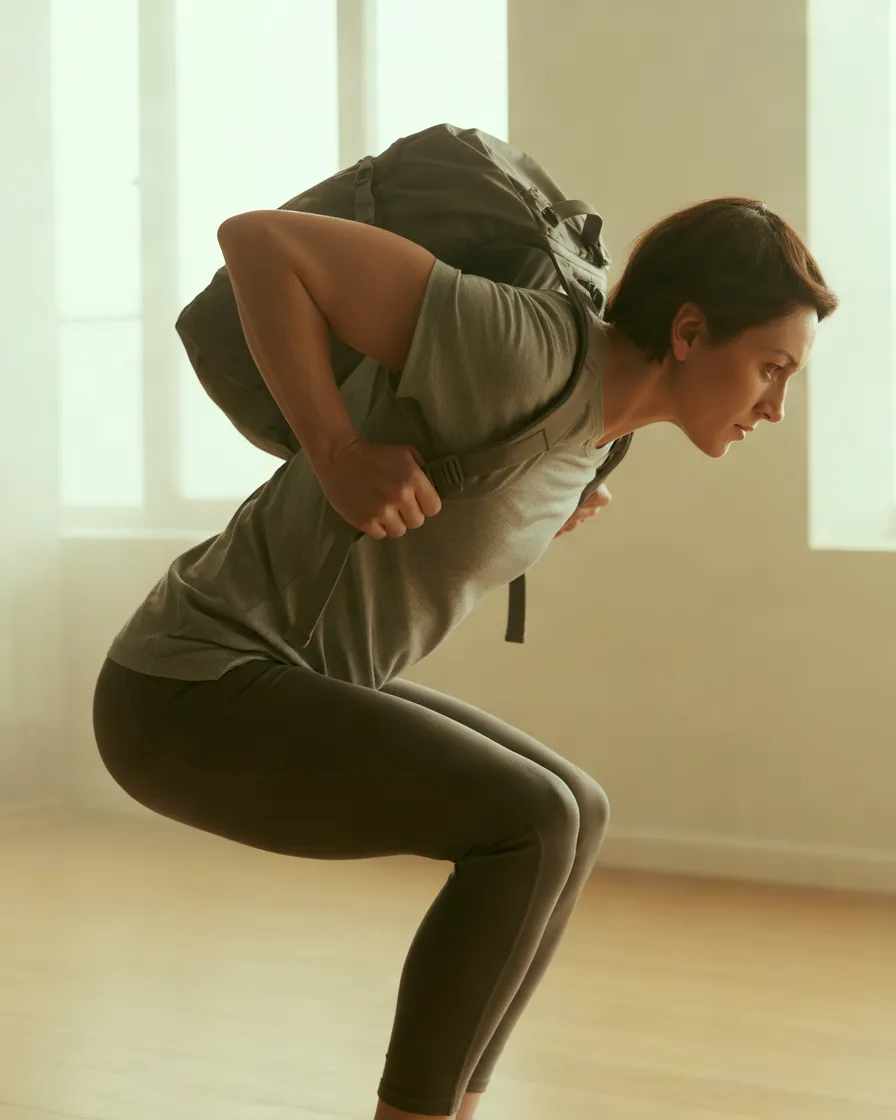
The bent-over backpack row is one of the most practical back workout at home exercises because it provides external resistance without requiring gym equipment. A backpack filled with a few securely packed books or water bottles can work as a simple substitute for a dumbbell.
The exercise primarily targets the latissimus dorsi, rhomboids, and trapezius, while your core and hip muscles help stabilise your body.
Benefits: Backpack rows help develop pulling strength and upper back muscular endurance. They are particularly useful for people who want to add resistance to a home workout without purchasing weights.
How to perform it:
- Place a few lightweight items inside a backpack and close it securely.
- Stand with your feet approximately hip-width apart.
- Push your hips backward and bend your knees slightly, keeping your spine in a comfortable neutral position.
- Hold the backpack by its handle or sturdy straps.
- Pull it toward your lower ribs by driving your elbows backward.
- Pause briefly, then lower it slowly without rounding your back.
Recommended starting point: Perform 8–12 repetitions for one or two sets, resting for 60–90 seconds between sets.
Practical tip: Imagine pulling your elbows toward your back pockets instead of simply lifting the bag with your hands. This can help you focus on the intended pulling movement.
Who it may suit: Beginners who want a straightforward upper back exercise, as well as experienced exercisers who need a convenient home alternative to dumbbell rows.
Important consideration: Begin with a light load. Do not use a backpack with damaged straps, loose contents, or an insecure handle. If maintaining the bent-over position causes discomfort, stop and choose a more comfortable exercise.
2. One-Arm Backpack Rows for Unilateral Back Training
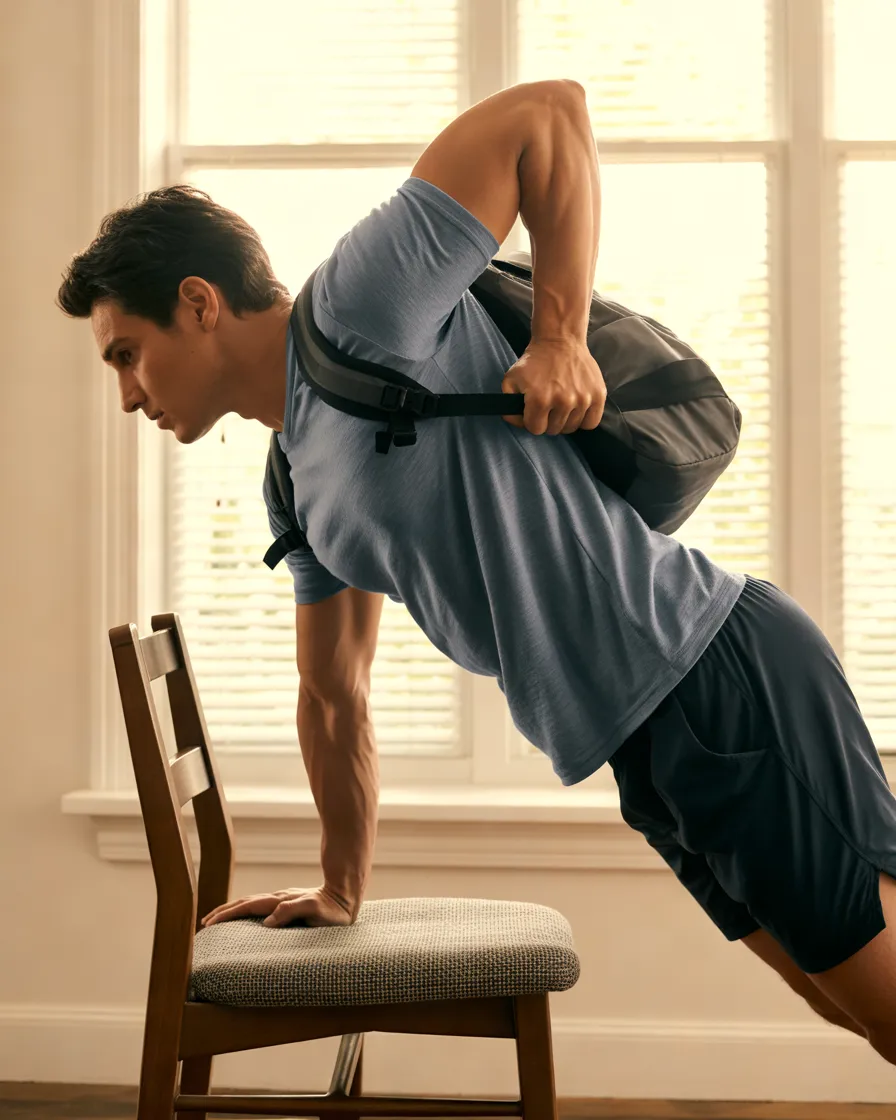
If you want to make your home back workout more targeted, the one-arm backpack row is a useful option. It allows you to train one side at a time, making it easier to concentrate on movement quality and notice differences in strength or control between sides.
The exercise works the lats and upper back muscles while requiring the trunk to resist unnecessary rotation.
Benefits: Unilateral rowing develops pulling strength and coordination. It can also help you identify whether one side tires more quickly than the other, although small differences between sides are normal.
How to perform it:
- Place a sturdy chair in front of you.
- Hold a lightweight backpack in your right hand.
- Place your left hand on the chair for support and step your feet into a stable position.
- Hinge forward from your hips while keeping your back comfortable and controlled.
- Pull the backpack toward your right hip, keeping your elbow relatively close to your body.
- Lower it slowly, complete your repetitions, and switch sides.
Recommended starting point: Try 8–10 repetitions per side for one or two sets.
Practical tip: Keep your shoulders and hips facing the floor. Avoid twisting your torso to lift the backpack, as this can turn the exercise into a swinging movement.
Who it may suit: People who have mastered the basic row and want more focused back training, particularly when using limited home equipment.
Important consideration: The supporting chair must be stable and placed on a nonslip surface. Start with a light backpack and reduce the load if your body rotates or your shoulder shrugs toward your ear.
3. Resistance Band Pull-Aparts for Stronger Upper Back Muscles
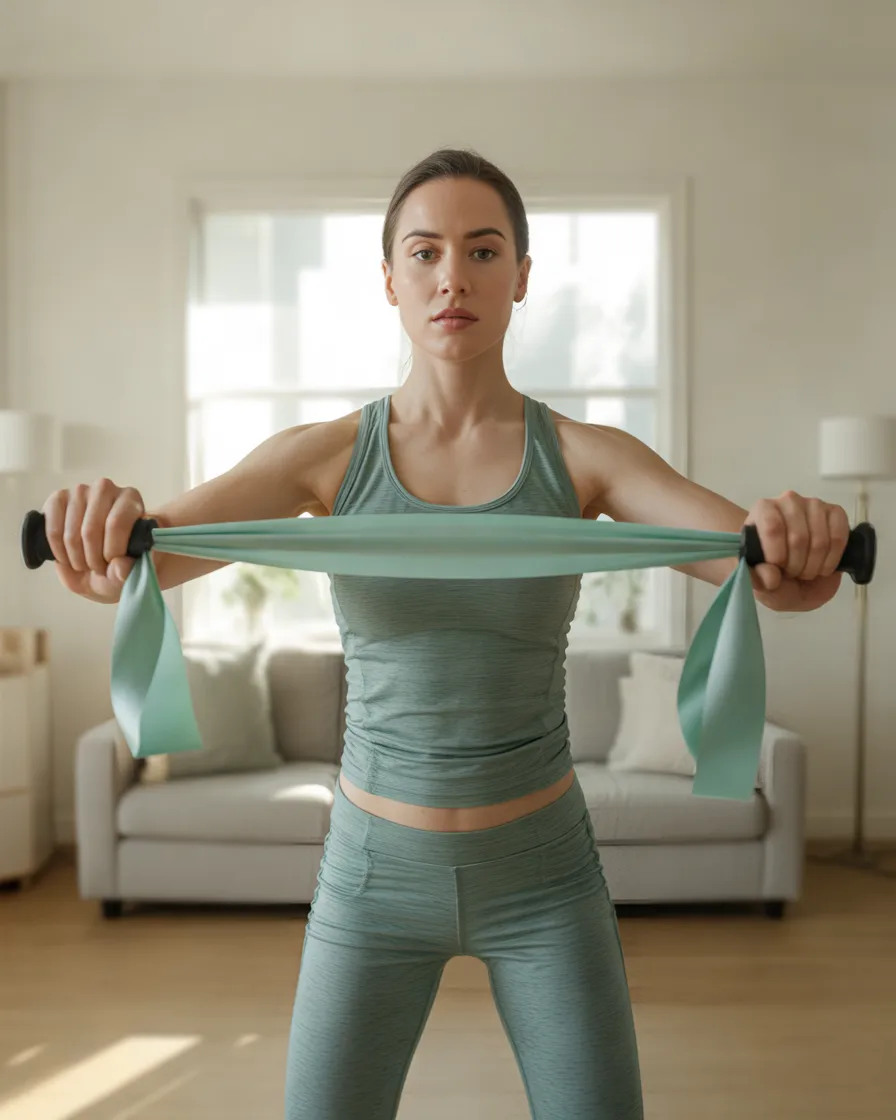
Resistance band pull-aparts are a simple way to train the muscles around your shoulder blades. Unlike rows, which involve pulling resistance toward your torso, this exercise involves stretching a band horizontally in front of you.
It primarily challenges the rear shoulder muscles and upper back, including the rhomboids and middle trapezius.
Benefits: Pull-aparts can help build upper back muscular endurance and improve your ability to control shoulder-blade movement. They are especially useful when you spend long periods working at a computer or sitting at a desk.
How to perform it:
- Hold a light resistance band with both hands at approximately shoulder height.
- Extend your arms in front of your chest, keeping a small bend in your elbows.
- Keep your shoulders relaxed rather than shrugging.
- Slowly pull your hands apart, stretching the band across your chest.
- Bring your shoulder blades gently toward one another without arching your lower back.
- Return to the starting position under control.
Recommended starting point: Perform 10–15 repetitions for one or two sets.
Practical tip: Use a lighter band than you think you need at first. The movement should feel controlled, with tension around your upper back and rear shoulders rather than strain in your neck.
Who it may suit: Beginners, desk workers, and people who want to add a low-equipment upper back exercise to a broader strength routine.
Important consideration: Inspect the band for cracks or damage before every session. Avoid snapping it back into position, and do not continue if the movement causes shoulder pain.
4. Bent-Over Reverse Flys With Water Bottles for Rear Shoulders and Upper Back

You do not need a pair of dumbbells to perform reverse flys. Small, securely capped water bottles can provide enough resistance to practise the movement and gradually develop upper back strength.
Reverse flys mainly target the rear deltoids and muscles that help control the shoulder blades. They complement rows by training the arms to move outward rather than primarily backward.
Benefits: This exercise supports balanced upper-body strength and develops muscular endurance in the rear shoulders and upper back. It also introduces a lighter, controlled movement that complements heavier pulling exercises.
How to perform it:
- Hold a small water bottle in each hand.
- Stand with your feet hip-width apart and hinge forward from your hips.
- Keep your knees slightly bent and your spine neutral.
- Let your arms hang beneath your shoulders with your palms facing each other.
- Raise your arms outward until they approach shoulder height, or stop earlier if that is more comfortable.
- Lower the bottles slowly to the starting position.
Recommended starting point: Try 8–12 repetitions for one or two sets.
Practical tip: Begin with small bottles. If you have to jerk your torso or swing your arms, the resistance is probably too heavy.
Who it may suit: People who already feel comfortable with basic back exercises and want to add a lighter movement for their upper back and rear shoulders.
Important consideration: Keep your neck relaxed and avoid forcing your arms too high. Anyone who experiences shoulder discomfort should reduce the range of motion or choose another exercise.
5. Bird Dog Exercise for Lower Back and Core Stability
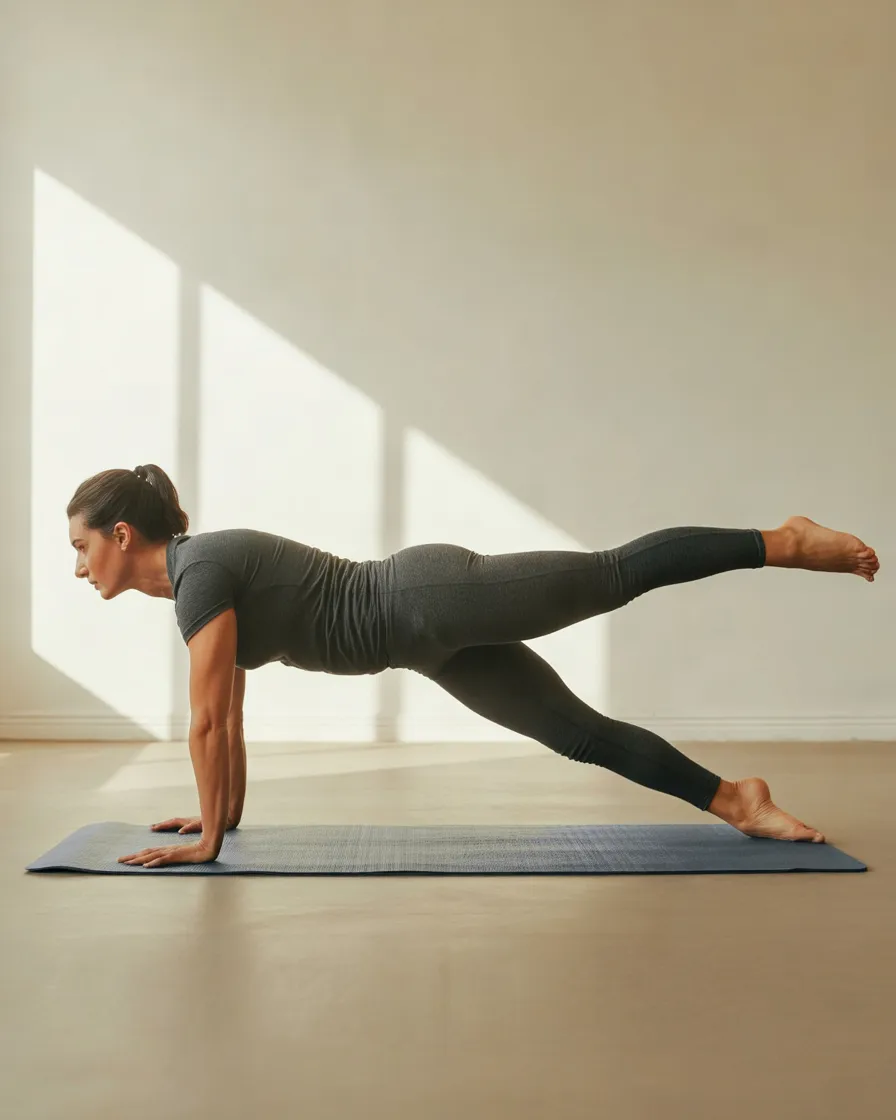
The bird dog is a bodyweight movement that challenges your ability to maintain a stable trunk while moving opposite limbs. It is an excellent addition to a beginner back workout because it does not require weights or complicated equipment.
Rather than repeatedly bending or arching your spine, you practise keeping your torso steady as your arm and leg move.
Benefits: Bird dogs train trunk control and coordination while engaging the muscles that help stabilise your spine. They also involve the glutes and shoulders, making the exercise useful for overall movement control.
How to perform it:
- Get onto your hands and knees on a nonslip mat.
- Position your hands beneath your shoulders and knees beneath your hips.
- Gently brace your abdominal muscles without holding your breath.
- Extend your right arm forward and your left leg backward.
- Keep your hips facing the floor and avoid arching your lower back.
- Hold the position for two to five seconds, then return slowly.
- Repeat with the opposite arm and leg.
Recommended starting point: Perform 6–8 repetitions per side for one or two sets.
Practical tip: Start by lifting only one arm or one leg if extending both feels difficult. The goal is steady movement, not lifting your limbs as high as possible.
Who it may suit: Beginners, people seeking a low-equipment stability exercise, and exercisers who want to complement rowing with core control.
Important consideration: Use a padded surface if kneeling is uncomfortable. Stop if you experience sharp pain, and seek professional guidance if you are exercising as part of recovery from a back injury.
6. Prone Y-T-W Raises for Shoulder Blade Control and Upper Back Strength
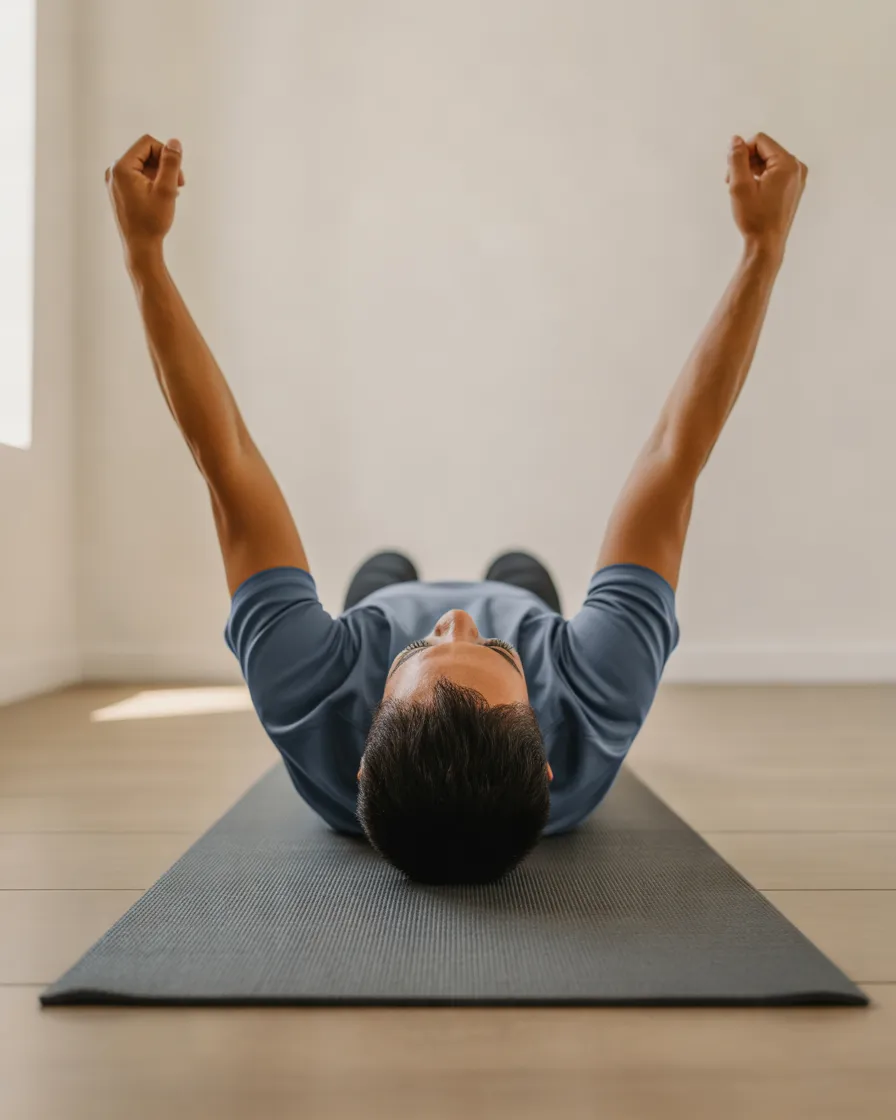
Prone Y-T-W raises are a series of small, controlled movements performed while lying face down. The name describes three arm positions: a Y shape overhead, a T shape out to the sides, and a W shape with the elbows bent.
These movements challenge the muscles around the shoulder blades and the rear shoulders. Because they use little or no external resistance, they are useful when you want to focus on technique rather than lifting heavy objects.
Benefits: Y-T-W raises develop upper back muscular endurance, shoulder-blade control, and coordination. They are also a useful complement to rowing exercises because they challenge the upper back from different arm positions.
How to perform it:
- Lie face down on a comfortable mat with your forehead resting lightly on a folded towel.
- Extend your arms overhead in a Y shape, keeping your thumbs pointing upward.
- Gently lift your hands a small distance from the floor without lifting your head or arching your lower back.
- Lower your arms, then extend them sideways into a T shape.
- Lower again and bend your elbows into a W shape, gently drawing your shoulder blades together.
- Move slowly through each position, using a comfortable range.
Recommended starting point: Perform 5–8 controlled repetitions of each arm position.
Practical tip: Think about making small, precise movements. Lifting your arms higher does not necessarily make the exercise more effective.
Who it may suit: People who want a no-equipment upper back exercise, including beginners who can comfortably lie face down.
Important consideration: Keep your neck relaxed. If lying on your stomach causes discomfort, try a standing variation or omit the exercise. Do not force your shoulders into positions that hurt.
7. Glute Bridges for Lower Back Support and Posterior Chain Strength
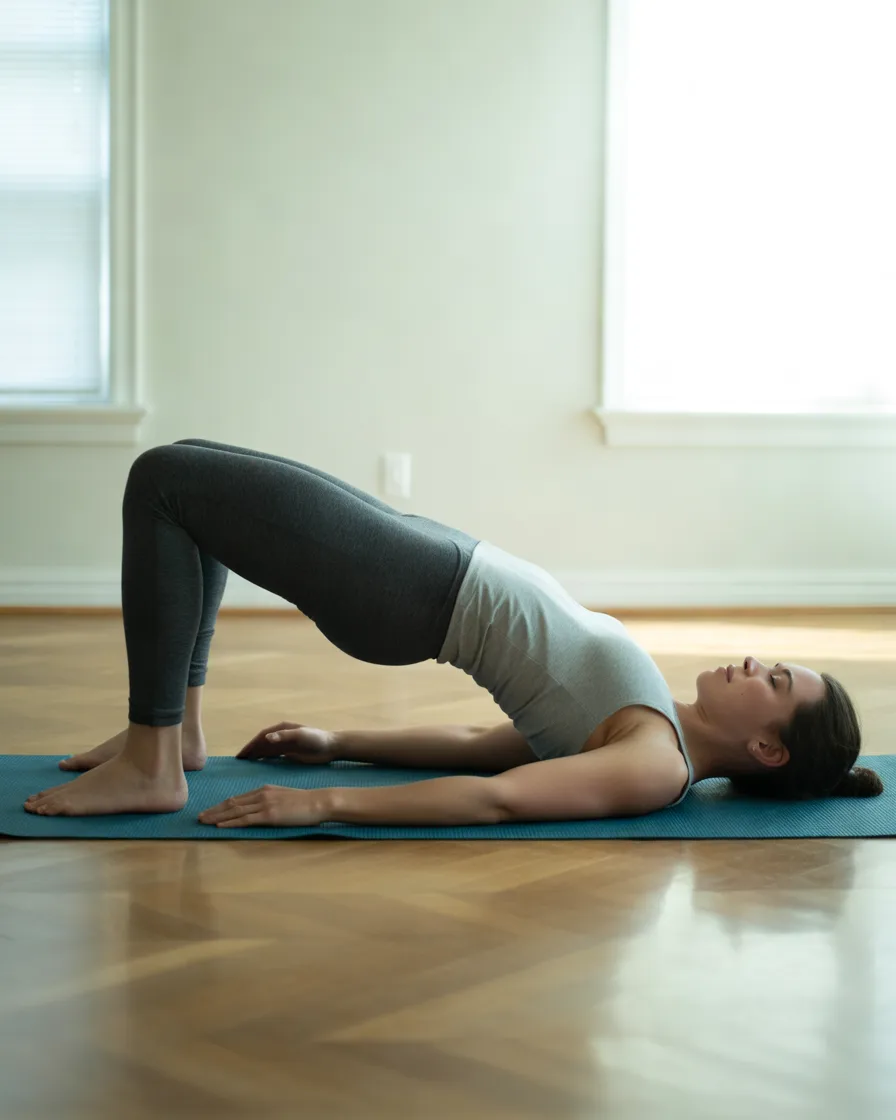
Although the glute bridge is not a direct upper back exercise, it belongs in a balanced back workout at home because it strengthens the gluteal muscles and trains the hips to extend.
Strong, coordinated glutes contribute to everyday movements such as standing up, climbing stairs, and lifting objects. The exercise also challenges the abdominal muscles to help control the position of your trunk.
Benefits: Glute bridges develop hip-extension strength, engage the glutes and hamstrings, and complement exercises that train the muscles around the spine. They are particularly useful for creating a more balanced posterior-chain routine.
How to perform it:
- Lie on your back with your knees bent and feet flat on the floor.
- Position your feet approximately hip-width apart.
- Rest your arms by your sides and gently brace your abdomen.
- Press through your feet and lift your hips until your shoulders, hips, and knees form an approximately straight line.
- Squeeze your glutes gently at the top without arching your lower back.
- Lower your hips slowly to the floor.
Recommended starting point: Perform 10–12 repetitions for one or two sets.
Practical tip: Concentrate on moving through your hips rather than pushing your stomach upward. You should feel the exercise mainly in your glutes, not as excessive pressure in your lower back.
Who it may suit: Beginners and intermediate exercisers who want to strengthen the muscles around their hips and trunk without using weights.
Important consideration: Start with a smaller hip lift if necessary. If the exercise produces back pain rather than muscular effort, stop and reassess your technique or seek professional guidance.
8. Bodyweight Hip Hinges for Learning Safer Lifting Mechanics
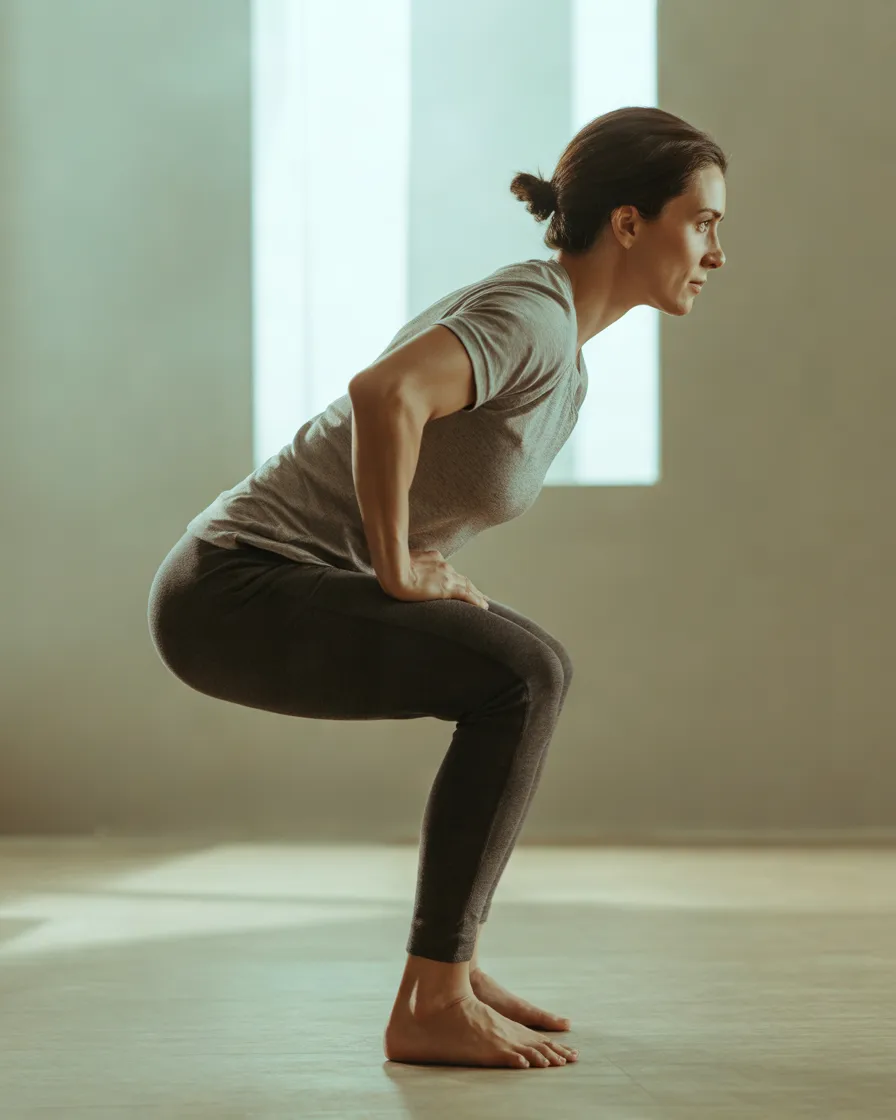
The bodyweight hip hinge, sometimes called a bodyweight good morning, teaches you to bend through your hips while keeping your spine controlled. It does not isolate the back muscles, but it helps develop a movement pattern used in many everyday lifting activities.
Once you understand the movement, it can also prepare you for exercises such as backpack rows, where you need to hold a bent-over position.
Benefits: Hip hinges train the glutes and hamstrings while encouraging coordination between the hips and trunk. Practising the pattern may help you become more comfortable with controlled bending during exercise and daily activities.
How to perform it:
- Stand with your feet approximately hip-width apart.
- Place your hands on your hips or cross your arms over your chest.
- Soften your knees without turning the movement into a squat.
- Push your hips backward as though you are closing a drawer with your bottom.
- Allow your torso to lean forward while keeping your spine in a comfortable neutral position.
- Stop when you reach the limit of your comfortable range, then press through your feet and return to standing.
Recommended starting point: Perform 8–12 slow repetitions for one or two sets.
Practical tip: Practise facing away from a wall and push your hips back until they lightly touch it. This can help you learn to move through your hips rather than rounding your back.
Who it may suit: Beginners learning basic lifting mechanics and anyone who wants to improve control before progressing to weighted hip hinges.
Important consideration: Do not force your torso to become parallel to the floor. The correct range varies between people. If you have an existing back condition, ask a qualified professional whether this movement is appropriate for you.
9. Wall Angels for Upper Back Mobility and Shoulder Control
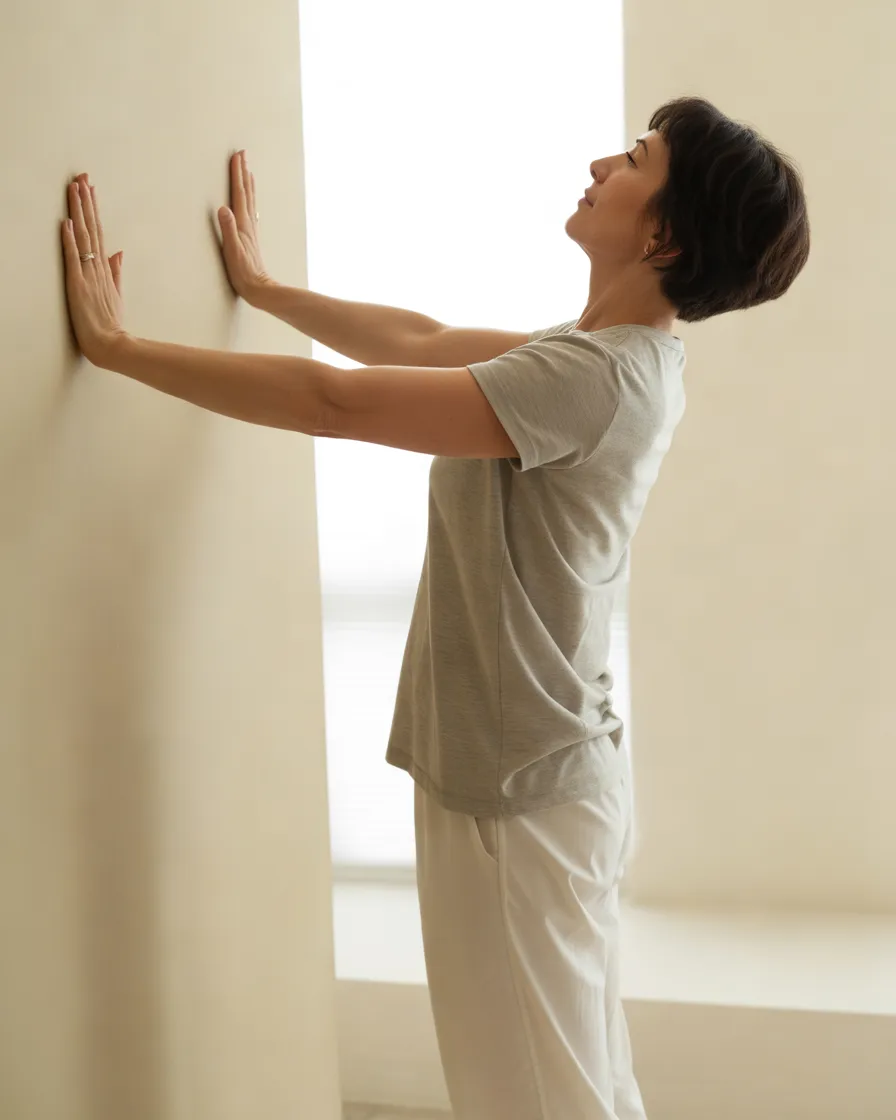
Wall angels are a simple movement for practising controlled shoulder motion and upper-body positioning. They do not replace resistance-based back exercises, but they can complement rows and pull-aparts in a well-rounded home routine.
The exercise involves moving your arms up and down while standing against a wall. Your range of motion will depend on your shoulder mobility and comfort.
Benefits: Wall angels encourage controlled shoulder movement and help you practise coordinating your arms with your upper back. They can be useful as a warm-up or a movement break during long periods of sitting.
How to perform it:
- Stand with your back against a wall and feet slightly forward.
- Keep your ribs comfortably positioned over your pelvis rather than flaring them forward.
- Bend your elbows into a W shape, with your arms positioned as comfortably as possible against the wall.
- Slowly slide your arms upward, moving toward a Y shape.
- Return to the starting position without shrugging your shoulders or forcing your lower back against the wall.
Recommended starting point: Perform 6–10 slow repetitions for one or two sets.
Practical tip: It is not necessary to keep every part of your arms touching the wall. Prioritise a smooth, comfortable movement over achieving a perfect-looking position.
Who it may suit: Desk workers, beginners, and exercisers looking for a gentle upper-body movement to complement their strength training.
Important consideration: Wall angels are a mobility and control exercise rather than a primary muscle-building movement. Stop if you experience shoulder pinching, numbness, or pain, and use a smaller range if necessary.
10. Prone Cobra Holds for Upper Back Endurance
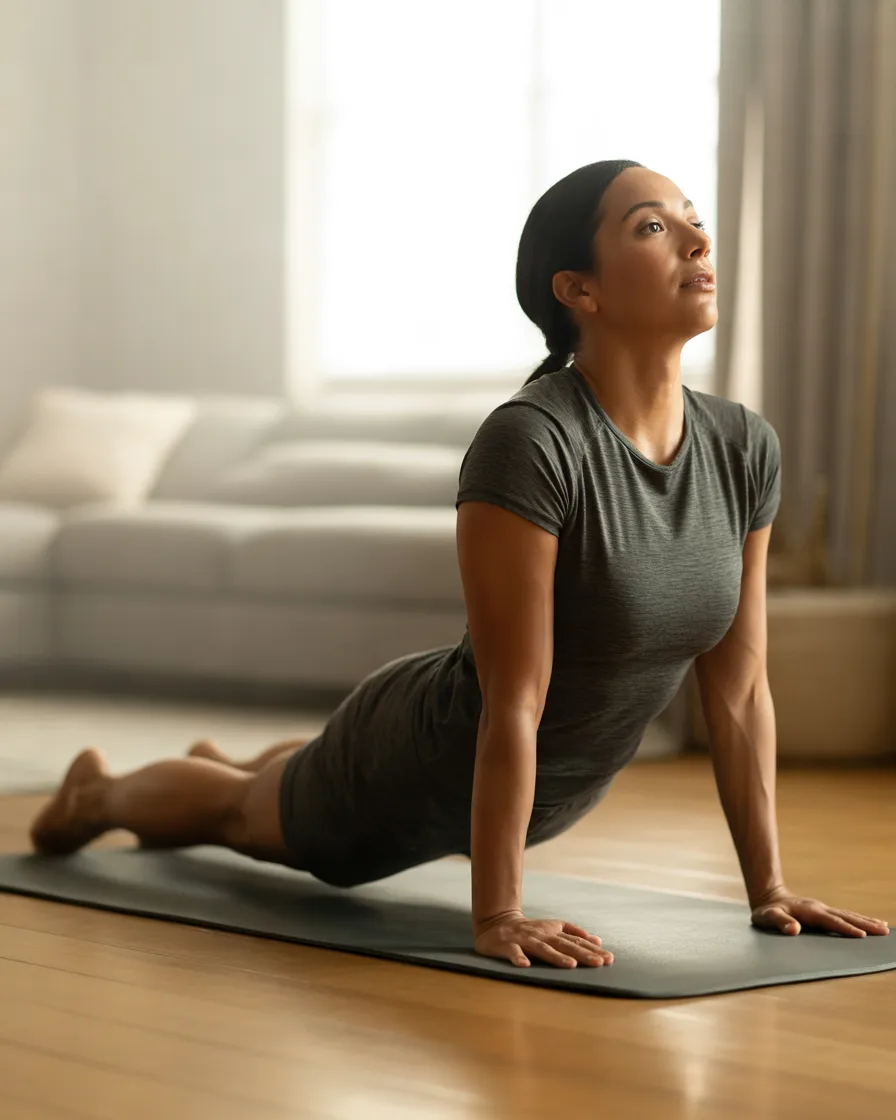
The prone cobra is a bodyweight isometric exercise in which you lie face down and gently lift your chest while keeping your arms alongside your body. It challenges the muscles along your upper back and the muscles that help control your shoulder blades.
Unlike a fast repetition-based exercise, the prone cobra focuses on maintaining a controlled position for a short period.
Benefits: The exercise develops upper back muscular endurance and encourages controlled shoulder positioning. It can provide variety in a home routine that otherwise relies heavily on pulling movements.
How to perform it:
- Lie face down on a comfortable mat, with your legs extended and forehead initially resting near the floor.
- Place your arms beside your body, palms facing inward or toward the floor.
- Gently draw your shoulder blades back and down.
- Lift your chest only a small distance from the floor while keeping your neck aligned with your spine.
- Hold the position briefly while breathing normally.
- Lower slowly and relax before repeating.
Recommended starting point: Try 3–5 holds of 5–10 seconds each.
Practical tip: Think of lengthening through the top of your head rather than looking upward. The movement should be small and controlled, not an exaggerated backbend.
Who it may suit: People who are comfortable lying face down and want to add a short upper back endurance exercise to their routine.
Important consideration: This movement involves spinal extension, so it is not suitable for everyone. Skip it if it causes back discomfort or if you have been advised to avoid extension-based movements. Bird dogs or wall angels are alternatives to consider.
Expert Tips for Getting Better Results From Your Back Workout at Home
A successful home back workout is not about performing the most exercises or finishing as quickly as possible. It is about using suitable resistance, maintaining good technique, and progressing gradually.
1. Prioritise movement quality over heavy resistance. When performing rows or reverse flys, avoid swinging your torso to move the weight. Slow, controlled repetitions help you notice whether you are maintaining the intended position.
2. Train your upper and lower body together. Rows, pull-aparts, and Y-T-W raises challenge different upper back muscles. Bird dogs, glute bridges, and hip hinges add trunk stability and hip strength. This combination is more balanced than relying on a single exercise.
3. Increase difficulty gradually. Once you can complete all your repetitions with consistent technique, consider adding a few repetitions, another set, or slightly more resistance. Change one variable at a time rather than increasing everything in the same session. Gradual progression is consistent with general strength-training guidance. (CDC)
4. Give your muscles time to recover. For most beginners, two nonconsecutive back-strengthening sessions per week provide a practical starting point. You can add walking, cycling, or other activities on different days according to your overall fitness plan.
5. Do not confuse soreness with progress. You do not need to feel extremely sore after every workout to make progress. Mild muscle fatigue can occur, particularly when you are new to exercise, but sharp pain or worsening symptoms are reasons to stop.
6. Breathe throughout each repetition. Exhale during the effort and inhale as you return to the starting position. Avoid holding your breath unnecessarily, especially when lifting resistance.
7. Make the routine convenient. Keep your resistance band and exercise mat somewhere accessible. A short workout that you perform consistently is often more practical than an ambitious plan that you repeatedly postpone.
A Simple Beginner Back Workout at Home Using These 10 Exercises
You do not have to perform all 10 exercises in one session. Start with a manageable selection, then add movements as you become more comfortable.
Here is an example of a beginner-friendly session that combines upper back strength, trunk control, and hip strength.
| Exercise | Starting target | Main focus |
|---|---|---|
| Bent-over backpack rows | 8–12 reps | Upper back and lats |
| Resistance band pull-aparts | 10–15 reps | Upper back and rear shoulders |
| Bird dogs | 6–8 per side | Trunk stability |
| Glute bridges | 10–12 reps | Glutes and hips |
| Wall angels | 6–10 reps | Shoulder control |
Perform one or two sets of each exercise, resting approximately 60–90 seconds between sets as needed. Allow around 15–25 minutes, depending on your rest periods and experience.
For a simple weekly schedule, try this approach:
- Monday: Complete the beginner back workout.
- Tuesday: Take a walk or do another comfortable physical activity.
- Wednesday: Rest or perform gentle mobility exercises.
- Thursday: Repeat the back workout if you have recovered comfortably.
- Friday to Sunday: Continue normal activities and include other forms of exercise you enjoy.
Adjust the schedule to your fitness level, recovery, and other training commitments. The example is a starting point, not a requirement to exercise on specific days.
As the routine becomes easier, you can add one or two of the remaining exercises, increase resistance gradually, or move toward two or three sets. General adult activity guidance supports muscle-strengthening exercise at least twice weekly, alongside appropriate aerobic activity. (CDC)
Frequently Asked Questions About Back Workout at Home Exercises
Can I build back muscles with a back workout at home?
Yes. You can build back strength and potentially increase muscle size through home training, provided the exercises challenge your muscles sufficiently and you progress over time. Backpack rows, resistance band exercises, and controlled bodyweight movements can all contribute. Your results will depend on resistance, training consistency, nutrition, recovery, and individual factors.
What is the best back workout at home for beginners?
A useful beginner routine includes bent-over backpack rows, bird dogs, glute bridges, resistance band pull-aparts, and wall angels. These exercises introduce pulling strength, trunk control, hip strength, and shoulder movement without requiring a gym. Start with light resistance and manageable repetitions, then progress as your technique improves.
Can I train my back at home without weights?
Absolutely. Bird dogs, prone Y-T-W raises, wall angels, and prone cobra holds use bodyweight rather than external weights. You can also use a resistance band if you have one. Bodyweight exercises are useful for beginners, although some people may eventually need additional resistance to keep progressing in strength.
How many days a week should I do back exercises at home?
Two sessions per week on nonconsecutive days is a reasonable starting point for many adults. Allow sufficient recovery between challenging sessions and adjust the frequency to your experience, other workouts, and how you feel. You do not need to train your back intensely every day.
Can a home back workout help with poor posture?
Strengthening the upper back and practising controlled shoulder movements may support your ability to maintain comfortable positions during daily activities. However, posture is influenced by several factors, and there is no single perfect posture for everyone. Regular movement, changes in working position, and a balanced exercise routine can all be useful.
Which back exercises should I avoid if I have lower back pain?
There is no single list of exercises that is unsafe for every person with back pain. Suitability depends on the cause of the pain, symptoms, medical history, and tolerance for particular movements. If an exercise causes sharp or worsening pain, stop rather than pushing through it. Seek individual guidance if pain persists or limits daily activities. The NHS advises medical assessment for concerning or persistent back symptoms. (NHS)
Seek emergency medical attention if back pain occurs with new bladder or bowel control problems, loss of sensation around the genitals or anus, or other serious neurological symptoms. (NHS)
Conclusion: Build a Stronger Back With a Consistent Home Workout
A back workout at home can be simple, affordable, and effective when you choose exercises that suit your current abilities. Backpack rows, resistance band pull-aparts, bird dogs, glute bridges, and other movements in this guide offer practical ways to train different muscle groups without relying on gym machines.
Start with a few exercises, practise controlled repetitions, and increase the challenge gradually. Pay attention to your recovery, use equipment safely, and remember that consistency matters more than completing an exhausting workout.
Most importantly, choose a routine that fits your life. With a manageable schedule and a balanced approach to strength training, you can work toward a stronger back and better overall physical fitness from the comfort of your home.