You do not need a gym membership, expensive equipment, or hours of free time to strengthen your lower body. With a little floor space and a consistent routine, you can work your thighs, glutes, hips, calves, and supporting muscles right at home.
A well-planned lower body workout at home can help improve muscular strength, balance, coordination, and everyday movement. These benefits can make activities such as climbing stairs, getting up from a chair, walking, and carrying shopping bags feel more manageable over time.
Your lower body contains some of your body’s largest muscle groups. Your quadriceps help straighten your knees, your hamstrings assist with bending your knees and extending your hips, and your gluteal muscles contribute to hip movement and stability. Your calves also play an important role in walking and pushing off the ground.
The good news is that many effective leg exercises use your own body weight as resistance. Squats, lunges, glute bridges, and calf raises are practical choices for people who prefer exercising at home. You can adjust the difficulty according to your fitness level, available space, and comfort.
In this guide, you will discover 10 lower body exercises you can perform at home without gym equipment. Each exercise includes its benefits, step-by-step instructions, practical tips, suitable fitness levels, and important safety considerations.
Whether you are starting your fitness journey or looking to refresh your existing routine, these exercises can help you build a simple, repeatable home workout.
1. Bodyweight Squats for Stronger Thighs and Glutes
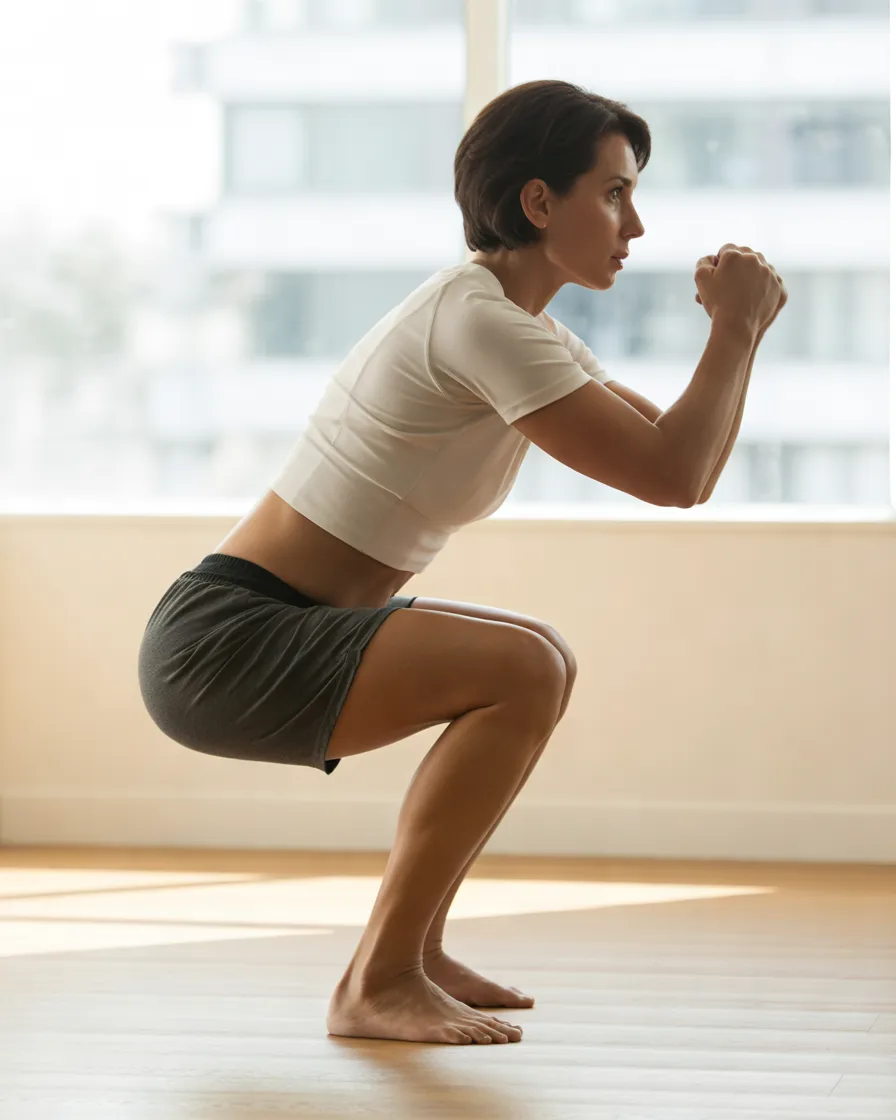
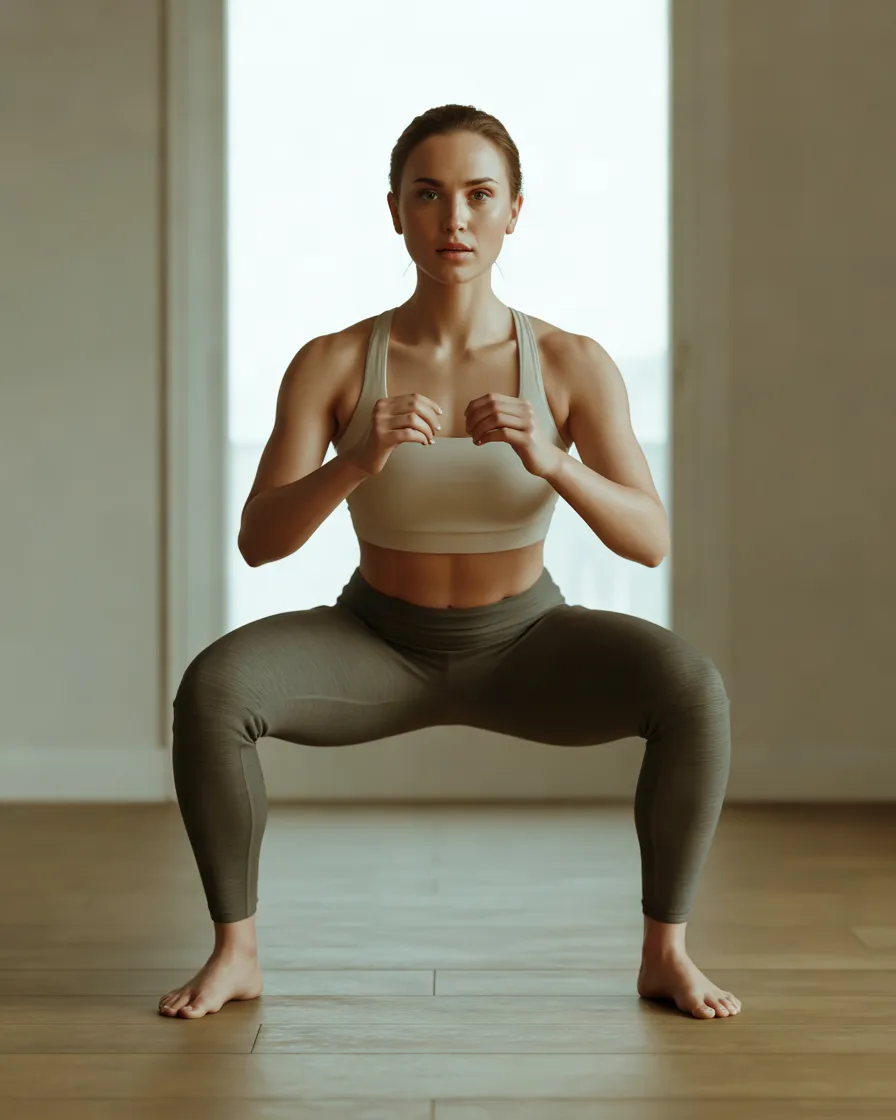
Bodyweight squats are a useful starting point for a lower body workout at home. They involve several muscle groups at once, including the quadriceps, glutes, hamstrings, and muscles that help stabilize your trunk.
Squatting also resembles everyday movements, such as sitting down and standing up. Learning to perform this movement with control can help you develop strength for daily activities.
Benefits
- Strengthens the quadriceps and gluteal muscles.
- Trains hip and knee coordination.
- Helps develop lower body muscular endurance.
- Provides a foundation for more challenging leg exercises.
How to perform the exercise
- Stand with your feet approximately shoulder-width apart.
- Keep your chest comfortably lifted and your feet flat on the floor.
- Bend your hips and knees as though you are sitting back into a chair.
- Lower yourself only as far as you can comfortably control.
- Press through your feet to return to standing.
- Repeat without rushing or bouncing at the bottom.
Recommended starting point: Perform 2–3 sets of 8–12 repetitions, resting for 45–90 seconds between sets.
Practical tips: Keep your knees moving in the same general direction as your toes. Your heels should remain grounded, and your weight should feel balanced across your feet. If balance is difficult, place a sturdy chair behind you and lightly touch it as you squat.
Who it may suit: Beginners, people returning to exercise, and anyone looking for an equipment-free way to train their thighs and glutes.
Important considerations: Do not force yourself into a deep squat. If you experience knee, hip, or back pain, reduce the range of motion or try a supported sit-to-stand variation. Persistent pain warrants advice from a qualified healthcare professional.
2. Reverse Lunges for Single-Leg Strength and Balance
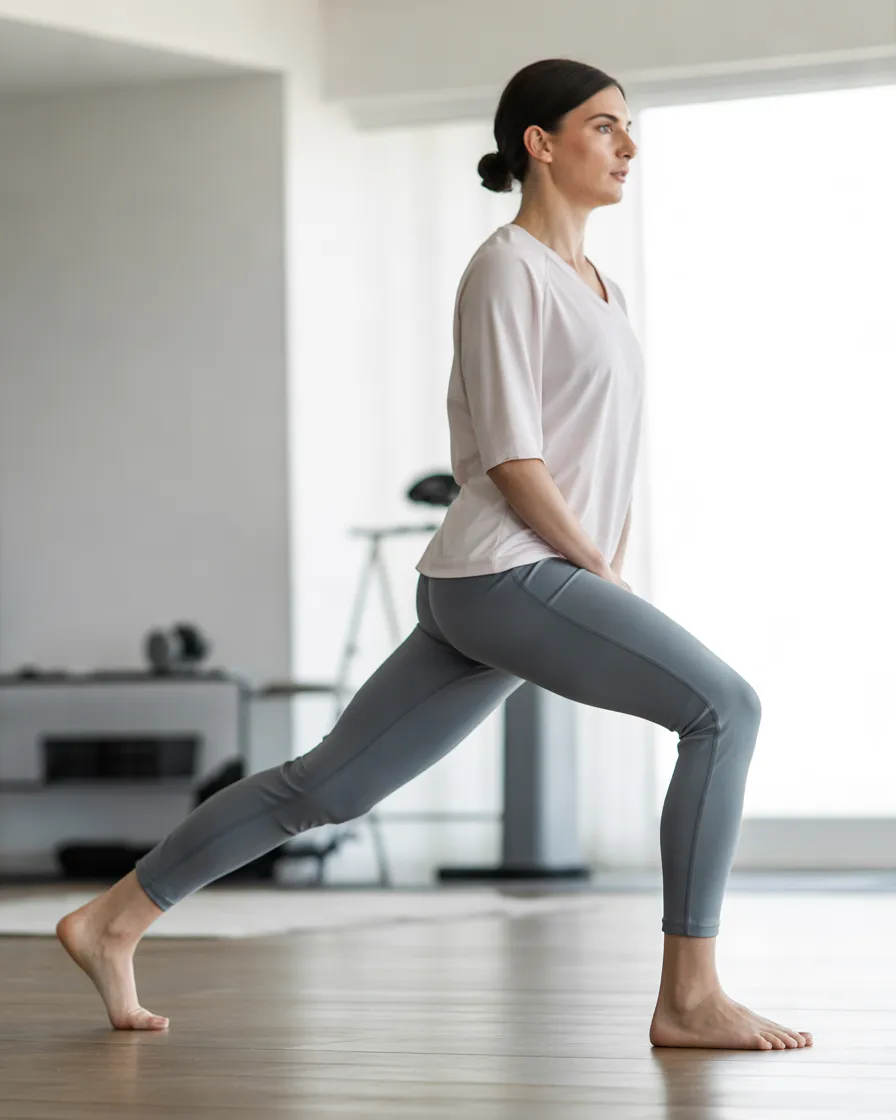
Reverse lunges are a practical addition to an at-home leg workout because they train one side of the body at a time. This allows you to work on strength, coordination, and balance without needing weights.
Compared with some forward-lunge variations, stepping backward may feel easier for certain people to control. However, comfort depends on individual mobility, balance, and knee tolerance.
Benefits
- Targets the quadriceps and glutes.
- Challenges balance and coordination.
- Allows you to notice differences between your legs.
- Helps develop control during single-leg movements.
How to perform the exercise
- Stand upright with your feet about hip-width apart.
- Step one foot backward, landing on the ball of that foot.
- Bend both knees as you lower your body under control.
- Keep your front foot flat and your front knee aligned with your toes.
- Push through your front foot to return to the starting position.
- Repeat on the other side.
Recommended starting point: Complete 2 sets of 6–10 repetitions per leg.
Practical tips: Begin with a small backward step rather than trying to lower your rear knee close to the floor. Hold a wall or sturdy chair for balance if necessary. Focus on smooth movement rather than speed.
Who it may suit: People with some basic standing balance who want to add variety to their beginner or intermediate lower body workout.
Important considerations: Lunges can challenge balance and place demands on the knees and hips. If you have difficulty controlling the movement, begin with supported split squats or chair sit-to-stands instead. Stop if you experience sharp pain, dizziness, or unusual discomfort.
3. Glute Bridges for Hip Strength and Posterior-Chain Training
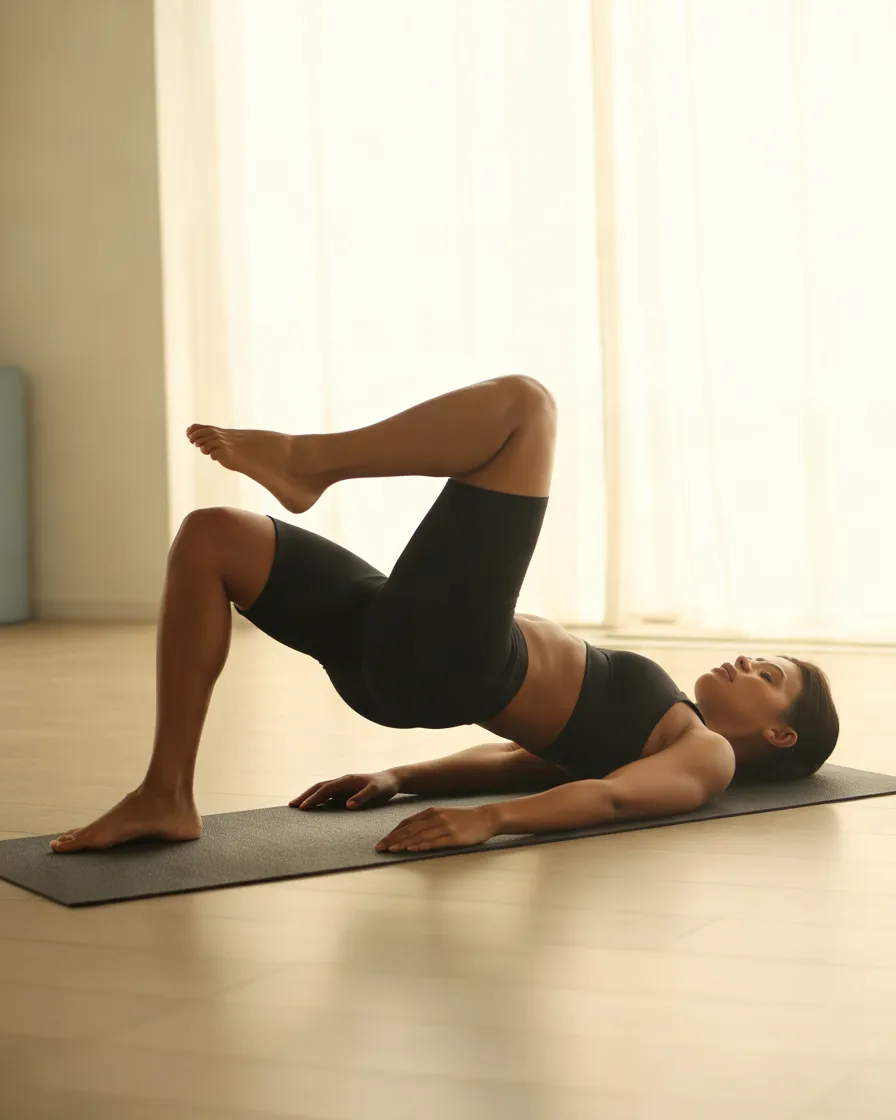
Glute bridges are performed on the floor and require no equipment. They primarily train the gluteal muscles, while the hamstrings and trunk muscles contribute to the movement.
This exercise is particularly useful if you want to train your hips without performing repeated standing movements. It can also provide variety when building a beginner-friendly home workout.
Benefits
- Strengthens the gluteal muscles.
- Trains controlled hip extension.
- Adds a floor-based exercise to balance standing movements.
- Offers a convenient alternative to weighted hip-thrust exercises.
How to perform the exercise
- Lie on your back with your knees bent and feet flat on the floor.
- Position your feet approximately hip-width apart.
- Rest your arms beside your body.
- Tighten your abdominal muscles gently.
- Press through your feet and lift your hips until your shoulders, hips, and knees form an approximately straight line.
- Pause briefly while squeezing your glutes.
- Lower your hips slowly to the floor.
Recommended starting point: Perform 2–3 sets of 10–15 repetitions.
Practical tips: Avoid pushing your hips so high that your lower back arches excessively. Think about lifting with your glutes rather than forcing the movement through your back. If you feel your hamstrings cramping, experiment with small adjustments to your foot position.
Who it may suit: Beginners, people who prefer floor exercises, and individuals who want to add glute-focused training to a home routine.
Important considerations: If lying on your back is uncomfortable or you have recently had abdominal, hip, or spinal surgery, seek appropriate professional guidance before trying this exercise. Reduce the movement if it causes pain.
4. Wall Sits for Thigh Endurance
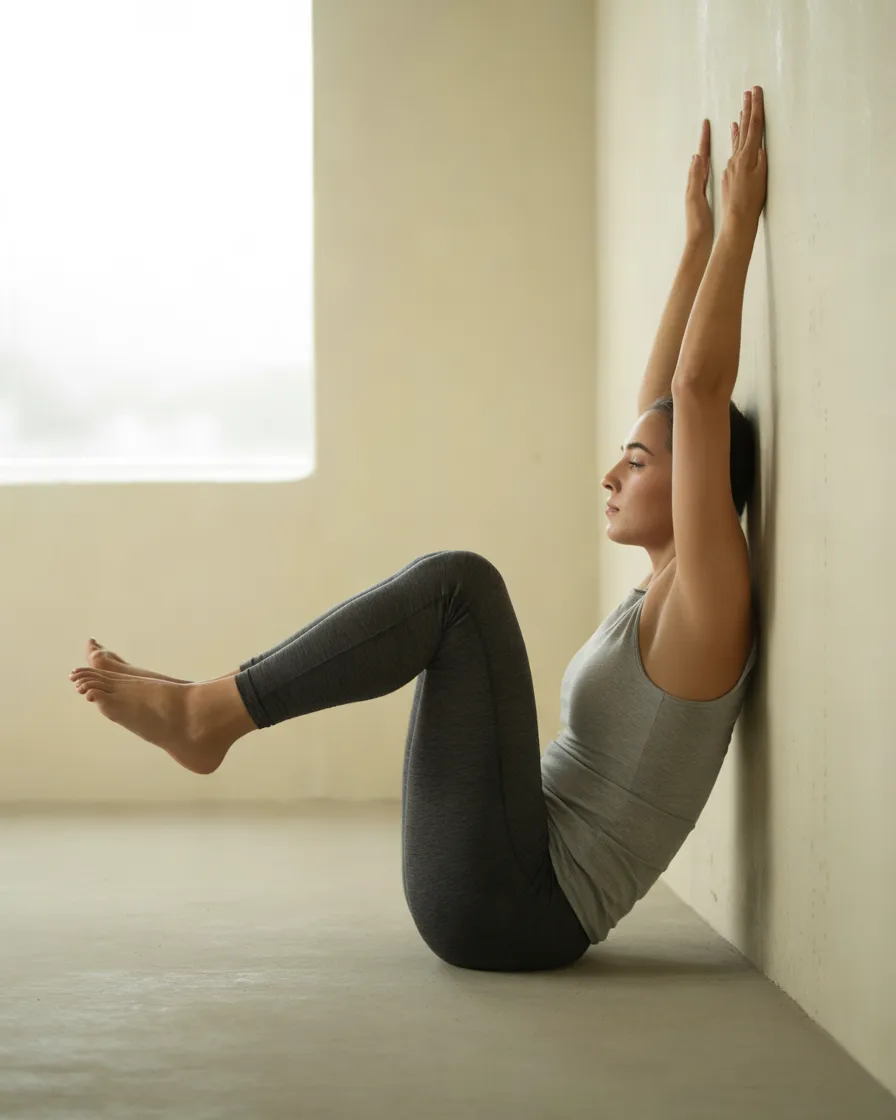
Wall sits provide a different challenge from squats. Instead of repeatedly moving up and down, you hold a seated position against a wall. This is an isometric exercise, meaning your muscles generate force while your joints remain relatively still.
Wall sits mainly challenge the quadriceps, with contributions from other muscles that help maintain the position.
Benefits
- Develops muscular endurance in the thighs.
- Requires very little space.
- Provides a simple way to adjust exercise intensity.
- Can be included in short home workouts.
How to perform the exercise
- Stand with your back against a stable wall.
- Walk your feet forward a short distance.
- Slide your back down the wall while bending your knees.
- Stop at a comfortable depth, even if your thighs are not parallel to the floor.
- Keep your feet flat and your knees aligned with your toes.
- Hold the position while breathing normally.
- Push through your feet to return to standing.
Recommended starting point: Hold for 15–30 seconds and repeat for 2–3 rounds.
Practical tips: Begin with a shallow bend in your knees. As your endurance improves, you can gradually increase the holding time or lower yourself slightly further, provided the position remains comfortable.
Who it may suit: People who want a simple thigh-strengthening exercise or prefer a routine with fewer repeated movements.
Important considerations: Wall sits may be uncomfortable for people with sensitive knees. A deeper position is not automatically better. Stop if you feel sharp pain, numbness, dizziness, or unusual pressure.
5. Step-Ups for Functional Leg Strength
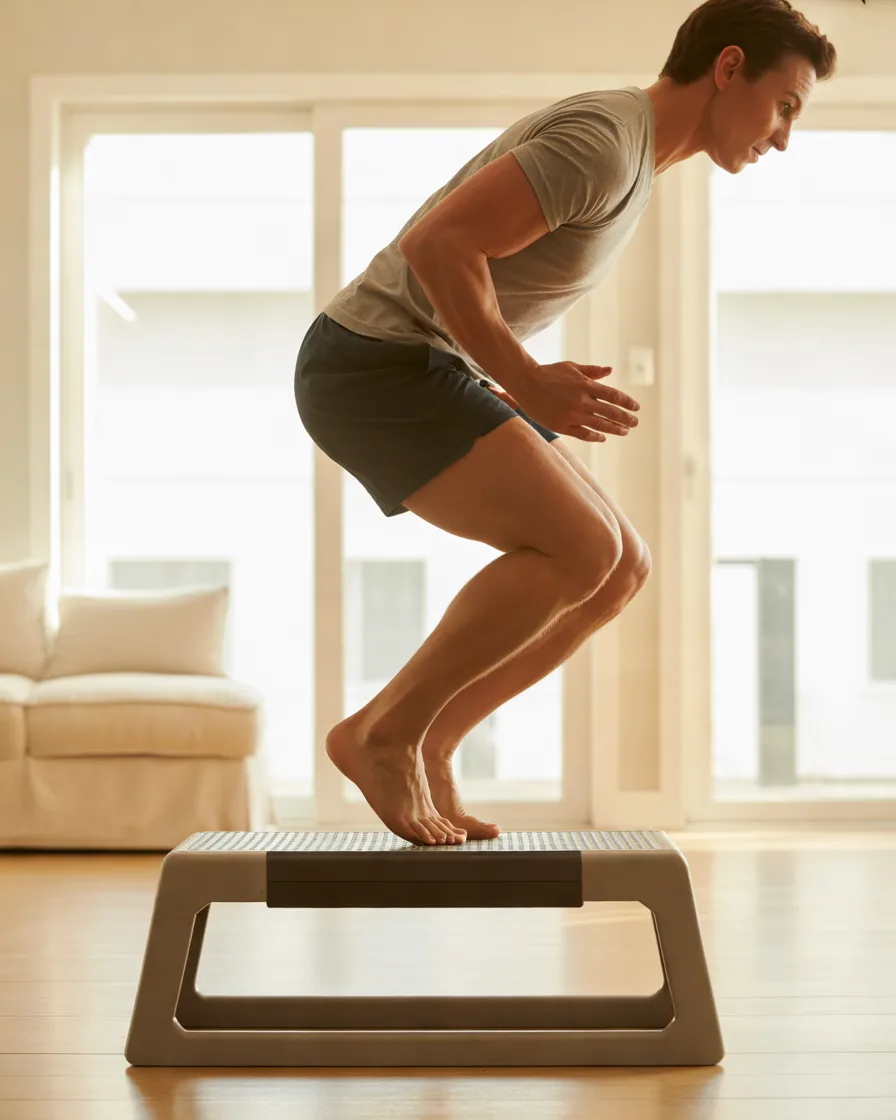
Step-ups use a raised surface to challenge the legs one at a time. The movement resembles climbing stairs and trains the quadriceps, glutes, and supporting muscles responsible for balance.
You can perform step-ups at home if you have a suitable, stable step. The height of the surface makes a significant difference to the difficulty, so beginners should start low.
Benefits
- Trains the muscles used during stair climbing.
- Challenges single-leg coordination.
- Works the thighs and glutes.
- Can be progressed by gradually increasing repetitions or using a slightly higher step.
How to perform the exercise
- Stand facing a low, stable step.
- Place one entire foot on the surface.
- Lean forward slightly from your hips while keeping your back neutral.
- Press through the raised foot to step up.
- Bring the other foot onto the surface.
- Step down slowly and repeat, leading with the opposite leg as appropriate.
Recommended starting point: Perform 2 sets of 6–10 repetitions per leg.
Practical tips: Choose a step that does not force your knee into an uncomfortable position. Keep the entire working foot supported. Avoid pushing excessively off the foot remaining on the floor, and use a handrail or stable support if needed.
Who it may suit: People who want functional leg training and have access to a suitable step or low platform.
Important considerations: Do not use unstable chairs, stacked books, or furniture that may slide or tip. If you have balance difficulties or a history of falls, use a secured handrail and seek guidance before adding step-ups.
6. Standing Calf Raises for Lower-Leg Strength
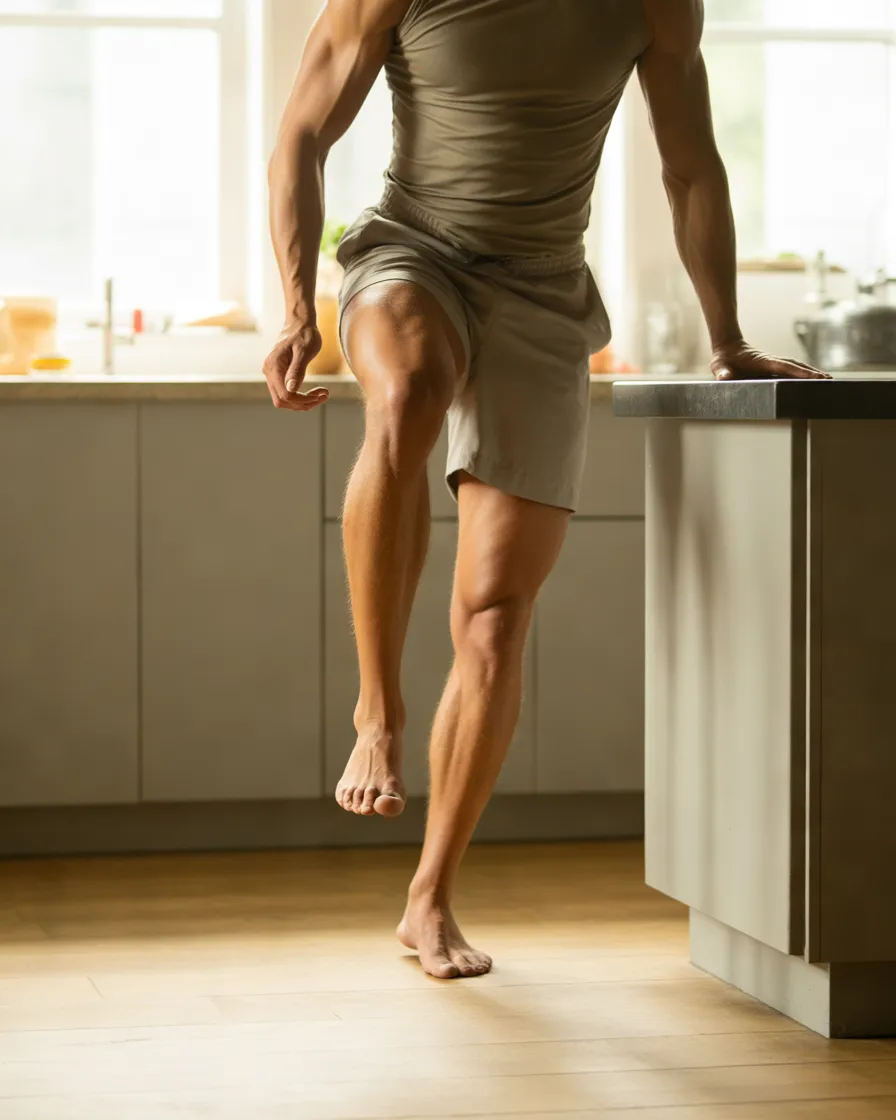
Calf raises are a simple way to train the muscles at the back of your lower legs. Your calves help you rise onto your toes and contribute to walking, running, and stair climbing.
Because the exercise involves a small movement, it is easy to underestimate its value. However, slow, controlled repetitions can provide a useful calf-strengthening challenge.
Benefits
- Strengthens the calf muscles.
- Trains control through the ankle.
- Requires little space.
- Can be performed during a short movement break at home.
How to perform the exercise
- Stand upright with your feet approximately hip-width apart.
- Hold a sturdy chair or countertop lightly for balance.
- Keep your knees comfortably straight without locking them forcefully.
- Raise your heels until you are standing on the balls of your feet.
- Pause briefly at the top.
- Lower your heels slowly to the floor.
Recommended starting point: Complete 2–3 sets of 12–15 repetitions.
Practical tips: Avoid bouncing. Try taking two seconds to rise and two seconds to lower your heels. If the movement becomes easy, increase your repetitions gradually before trying a more challenging variation.
Who it may suit: Beginners and experienced exercisers who want a dedicated calf exercise in their lower body routine.
Important considerations: Hold a stable support if your balance is uncertain. People with Achilles tendon problems, significant ankle pain, or recent lower-leg injuries should ask a healthcare professional which calf exercises are appropriate.
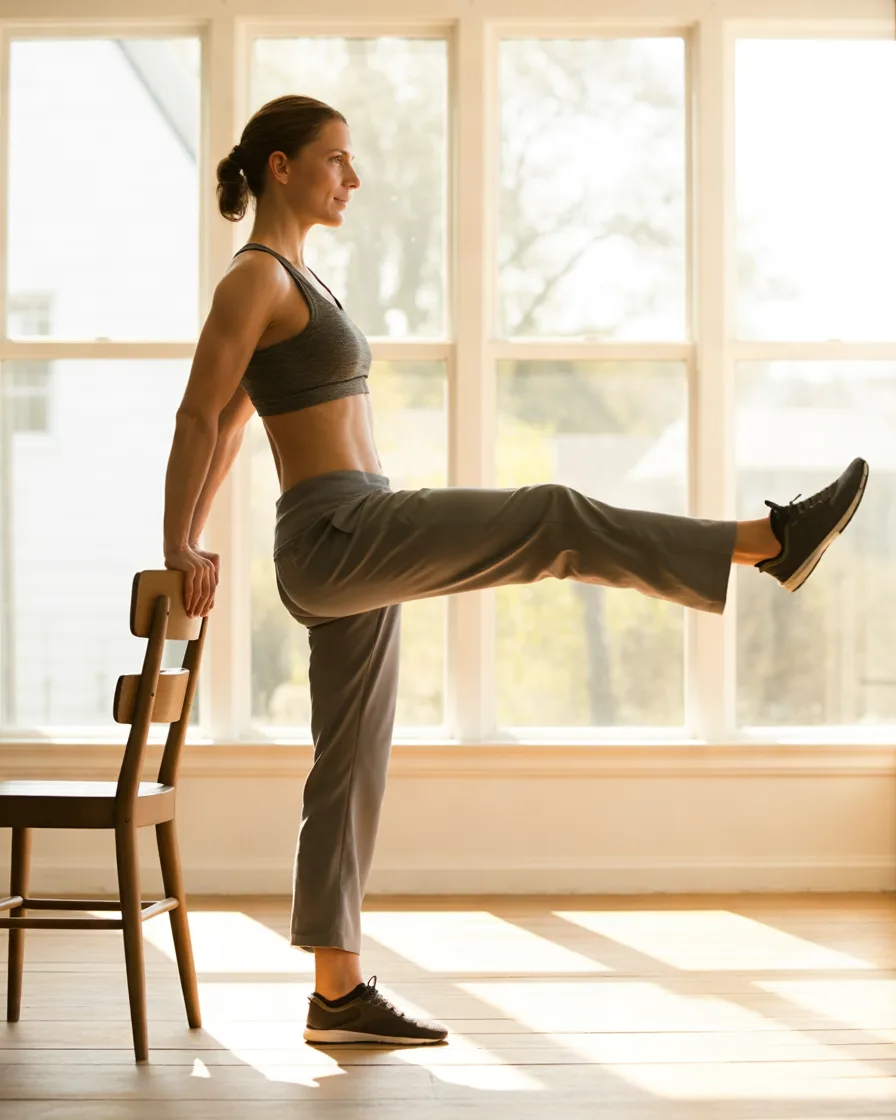
7. Side-Lying Leg Raises for Hip Abductor Strength
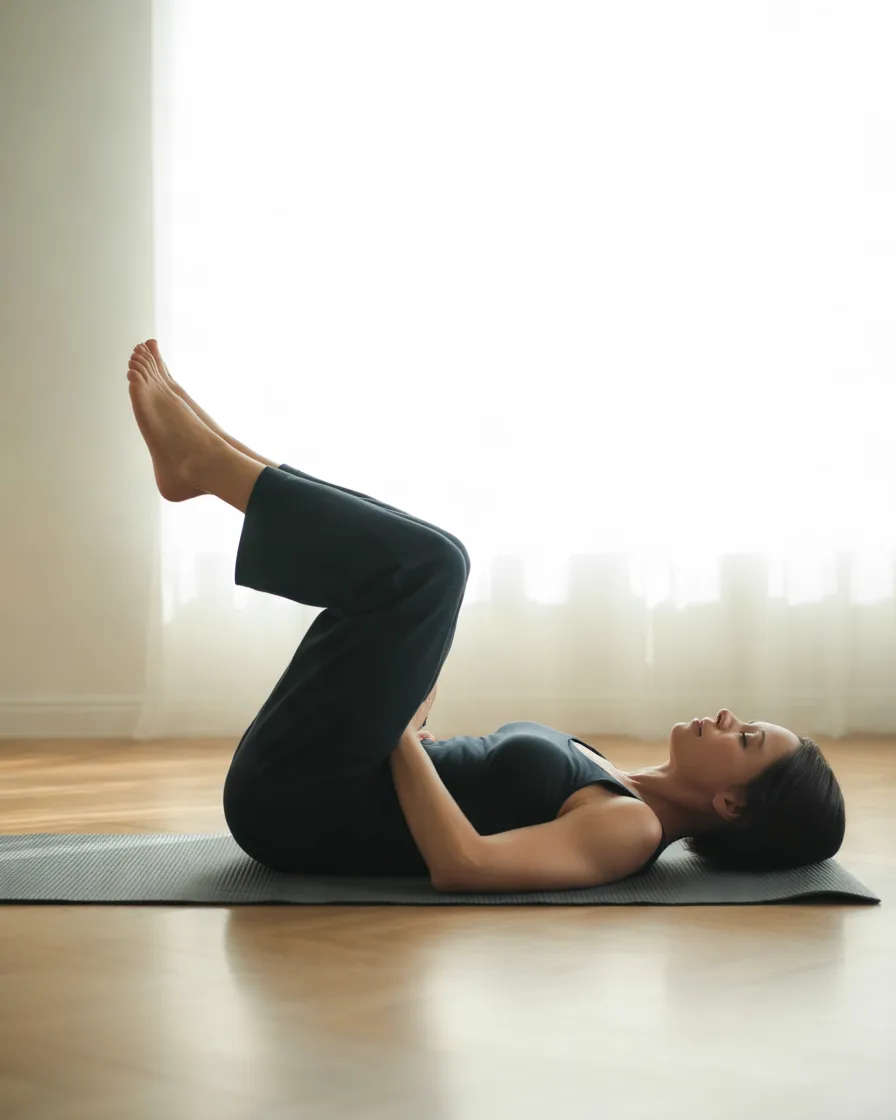
Side-lying leg raises focus on the muscles along the outer hip, including the hip abductors. These muscles help move the leg away from the body’s midline and contribute to pelvic stability during walking and other single-leg activities.
This floor exercise complements squats and lunges because it emphasizes a different direction of movement.
Benefits
- Trains the muscles on the outside of the hips.
- Adds variety to a bodyweight leg routine.
- Allows controlled movement without standing balance demands.
- Can be useful when building a broader hip-strengthening routine.
How to perform the exercise
- Lie on one side on a comfortable mat.
- Bend your lower arm to support your head.
- Keep your legs extended, with your hips stacked.
- Move your upper leg slightly behind your body rather than swinging it forward.
- Lift the upper leg slowly without rolling your pelvis backward.
- Pause briefly, then lower the leg under control.
- Complete your repetitions and change sides.
Recommended starting point: Perform 2 sets of 10–15 repetitions per side.
Practical tips: Keep the movement small enough to maintain control. Point your toes forward rather than turning the whole leg toward the ceiling. If your hip flexors become more noticeable than your outer hip muscles, adjust the position and reduce the height of the lift.
Who it may suit: Beginners, people who prefer mat-based exercises, and anyone wanting to include outer-hip training in a balanced lower body routine.
Important considerations: Avoid forcing the leg upward or continuing through hip pain. If you have recently undergone hip surgery or have a diagnosed hip condition, follow your clinician’s exercise recommendations.
8. Split Squats for Controlled Single-Leg Training
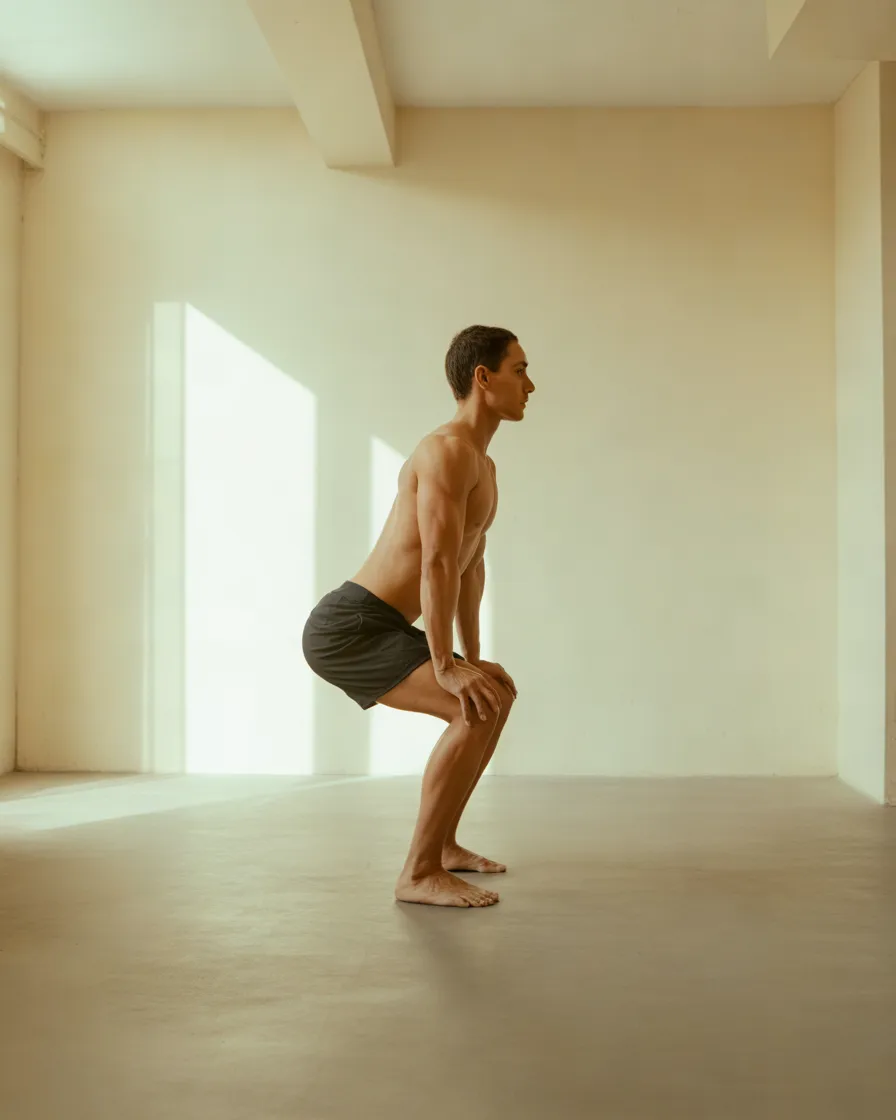
Split squats look similar to lunges, but your feet stay in place throughout each repetition. This makes them useful for practising lower body control without repeatedly stepping forward or backward.
The exercise trains the quadriceps and glutes while challenging your ability to maintain balance in a staggered stance.
Benefits
- Develops single-leg strength.
- Trains hip and knee coordination.
- Allows you to adjust depth and stance length.
- Provides a progression from basic bodyweight squats.
How to perform the exercise
- Stand with one foot in front of the other, as if standing on two separate tracks.
- Keep your feet far enough apart to feel balanced.
- Bend both knees and lower your body slowly.
- Keep your front foot flat and your torso comfortably upright.
- Stop at a depth you can control.
- Press through your front foot to return to standing.
- Finish your set before switching legs.
Recommended starting point: Perform 2 sets of 6–10 repetitions per side.
Practical tips: Use a wall or chair for light support when learning the movement. Adjust your stance until your front knee and hip feel comfortable. A slightly longer stance may change the muscular demands, but comfort and control should guide your position.
Who it may suit: People who can comfortably perform basic squats and want to progress toward more demanding leg exercises.
Important considerations: Split squats can be challenging for people with limited balance or knee mobility. Begin with a shallow range of motion and stop if pain develops. You do not need to lower your back knee to the floor for the exercise to be useful.
9. Bodyweight Good Mornings for Hamstrings and Hip Control
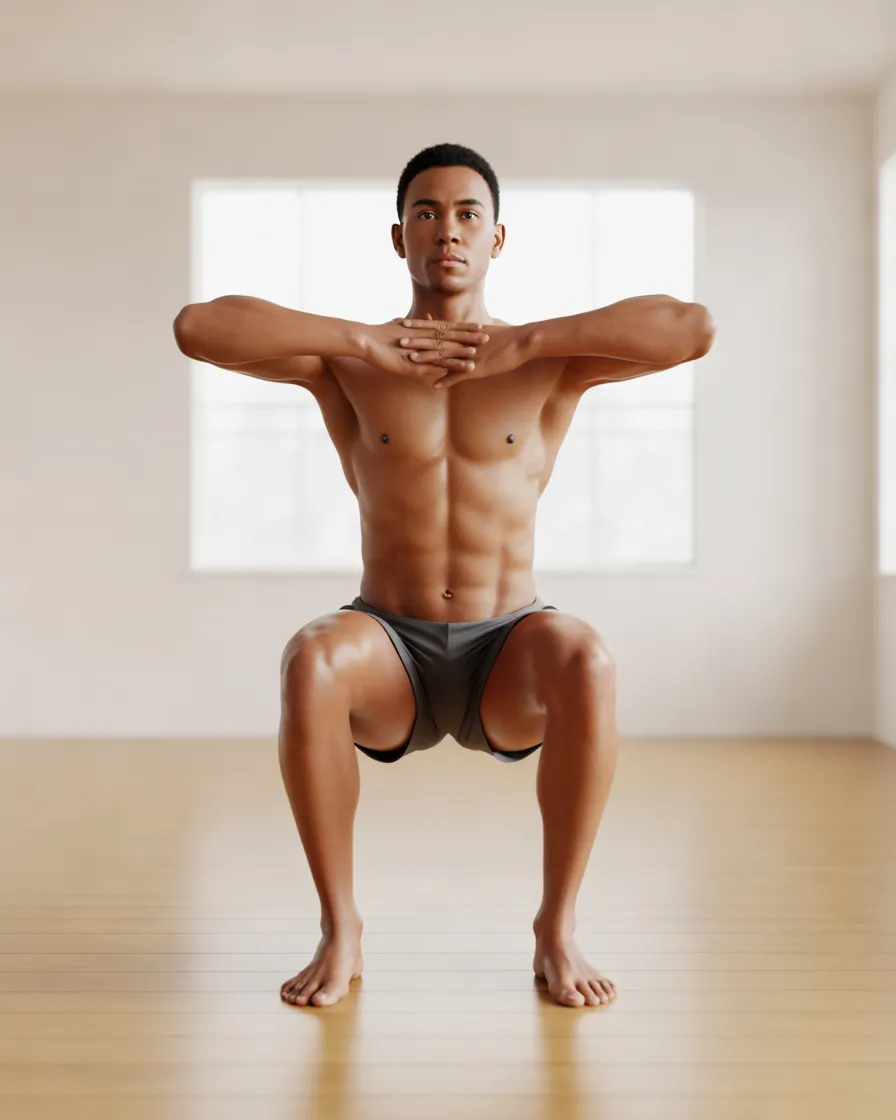
Bodyweight good mornings train the hip-hinge movement, which involves bending at the hips while keeping the spine in a controlled position. This pattern helps you practise moving your hips backward instead of relying entirely on knee bending.
The exercise targets the hamstrings and glutes, with the muscles of your back and trunk helping maintain a stable posture.
Benefits
- Builds familiarity with the hip-hinge pattern.
- Trains the hamstrings and glutes.
- Encourages controlled movement through the hips.
- Complements knee-dominant exercises such as squats.
How to perform the exercise
- Stand with your feet approximately hip-width apart.
- Place your hands across your chest or lightly behind your head.
- Keep your knees slightly bent.
- Push your hips backward while leaning your torso forward.
- Maintain a neutral spine and keep your head aligned with your torso.
- Stop when you feel a comfortable stretch in the back of your thighs.
- Press your feet into the floor and bring your hips forward to stand upright.
Recommended starting point: Perform 2 sets of 8–12 controlled repetitions.
Practical tips: Imagine closing a car door with your hips. Your hips should move backward while your torso inclines forward. Begin with a small range of motion and practise in front of a mirror if it helps you maintain your posture.
Who it may suit: Beginners who want to learn hip-hinge mechanics and more experienced exercisers seeking additional posterior-chain training without weights.
Important considerations: Do not round your back or force a deep forward bend. People with current back pain or conditions that restrict bending should seek individualized advice before performing the exercise.
10. Squat Pulses for an Additional Muscular-Endurance Challenge
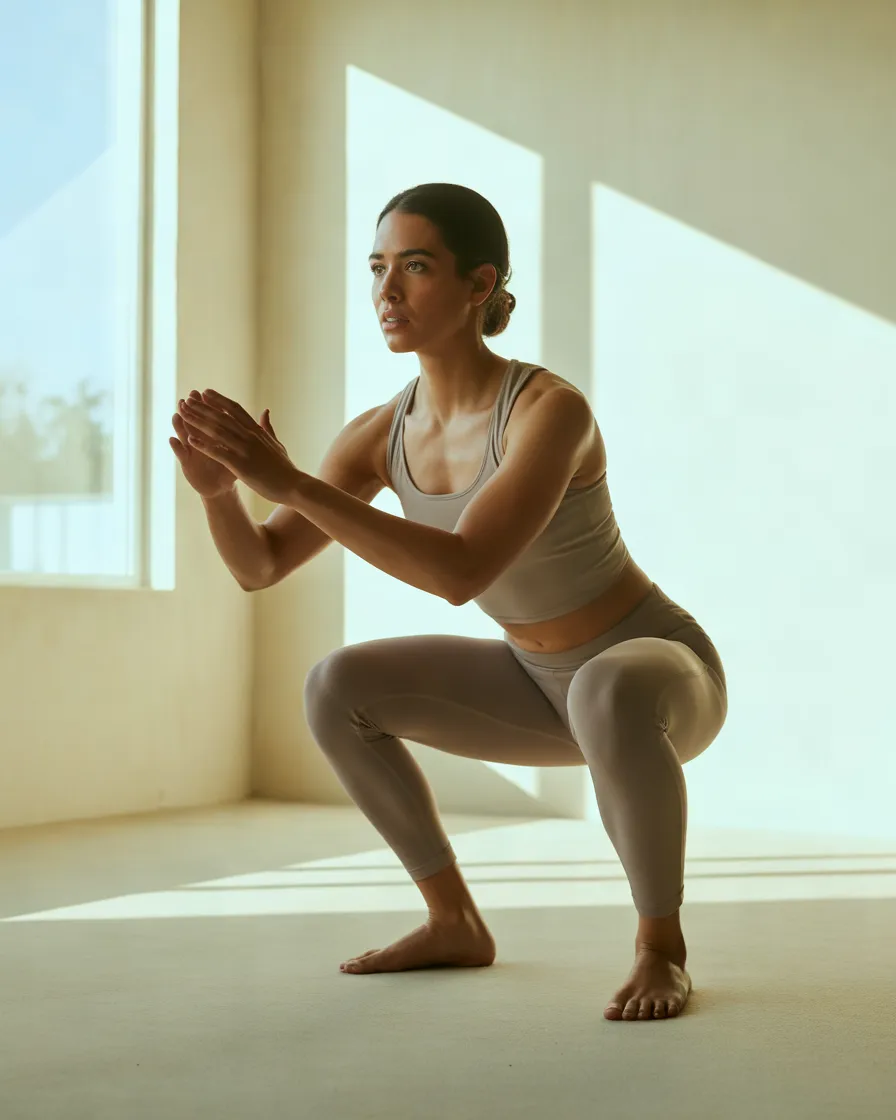
Squat pulses use short, controlled movements near the lower portion of a squat. They can increase the time your leg muscles spend working without requiring additional equipment.
Because the muscles remain under tension for longer, this variation can feel more demanding than regular squats, even though the movement is smaller.
Benefits
- Challenges quadriceps and gluteal muscular endurance.
- Adds variety to a home leg workout.
- Requires minimal space.
- Provides a simple progression for people comfortable with standard squats.
How to perform the exercise
- Stand with your feet around shoulder-width apart.
- Lower into a comfortable squat position.
- Stay within a small range of motion near that position.
- Move slightly upward and downward without fully standing between repetitions.
- Maintain stable feet and controlled knee alignment.
- After the planned repetitions, stand up slowly.
Recommended starting point: Complete 2 sets of 8–12 small pulses.
Practical tips: Keep the pulses small rather than bouncing deeply. Maintain a comfortable squat depth and breathe throughout the set. If your technique deteriorates, return to regular bodyweight squats.
Who it may suit: People who can already perform bodyweight squats comfortably and want to introduce a more demanding variation.
Important considerations: Squat pulses are optional, not essential. They may irritate sensitive knees if the position is uncomfortable. Beginners can skip this variation until they have developed control with standard squats.
Expert Tips for Getting More from Your Lower Body Workout at Home
Choosing effective exercises is only part of building a sustainable routine. Your technique, training frequency, recovery, and progression also matter.
1. Warm up before exercising. Spend approximately five minutes walking around your home, marching gently in place, or performing comfortable hip and ankle movements. A warm-up should prepare you for exercise rather than tire you out.
2. Start with fewer exercises. You do not need to perform all 10 movements in your first session. Beginners can start with squats, glute bridges, calf raises, and supported reverse lunges. Add other exercises as your confidence improves.
3. Focus on technique before repetitions. Eight controlled squats are more useful than a larger number performed with poor control. Reduce the repetitions, range of motion, or difficulty whenever your technique begins to deteriorate.
4. Train consistently, not excessively. For many beginners, two lower body sessions per week on non-consecutive days provide a manageable starting point. Allow enough recovery between challenging sessions and adjust your schedule to your fitness level.
5. Progress gradually. When an exercise becomes comfortable, you could add a few repetitions, complete another set, slow the lowering phase, or try a slightly more challenging variation. Change one factor at a time rather than increasing everything together.
6. Rest between sets. Around 45–90 seconds may be sufficient for many bodyweight exercises, but take longer if you need it. You should be able to maintain safe technique during the next set.
7. Breathe normally. Avoid holding your breath throughout repetitions. Exhale during the more demanding part of the movement and inhale during the easier or returning phase when comfortable.
8. Support recovery with everyday habits. Eat balanced meals with adequate protein, drink fluids regularly, and get enough sleep. Your overall nutrition and recovery habits can influence how well you tolerate and adapt to training.
9. Understand normal muscle soreness. Mild muscle soreness can occur after unfamiliar exercise, but sharp pain, significant swelling, joint instability, or symptoms that worsen should not be dismissed as normal training discomfort.
10. Remember that progress differs between individuals. Your starting fitness level, age, recovery, exercise technique, and consistency all influence progress. A routine should become more manageable over time, but there is no guaranteed timeline for visible changes.
A Simple 20-Minute Lower Body Workout at Home for Beginners
If you prefer a ready-to-follow plan, the following routine combines several exercises from this list. You can complete it in a small space without weights.
Warm-up — 4 minutes
- March gently in place.
- Perform comfortable ankle circles.
- Practise a few shallow bodyweight squats.
- Move your hips gently through a comfortable range.
Main workout — approximately 12–14 minutes
| Exercise | Sets | Repetitions or time |
|---|---|---|
| Bodyweight squats | 2 | 8–12 |
| Glute bridges | 2 | 10–12 |
| Supported reverse lunges | 2 | 6 per leg |
| Standing calf raises | 2 | 12–15 |
| Side-lying leg raises | 2 | 10 per side |
Rest for approximately 45–90 seconds between sets, or longer if needed. The total duration will depend on your pace and recovery time.
Cool-down — 2 minutes
Walk slowly around your room and perform gentle, comfortable stretches if desired. Do not force a stretch or push into pain.
If you are new to exercise, start with one set of each movement. Once the routine feels manageable, progress toward the suggested sets and repetitions.
You can substitute chair sit-to-stands for squats or use a wall for support during lunges. The best beginner leg workout is one that allows you to maintain good technique and repeat the routine consistently.
Frequently Asked Questions About Lower Body Workout at Home
1. Can I build leg strength with a lower body workout at home?
Yes. Bodyweight exercises can help improve lower body strength, particularly for beginners. Squats, split squats, glute bridges, and calf raises provide resistance through your own body weight. As you become stronger, you may need additional repetitions, more challenging variations, or external resistance to continue progressing.
2. How many days a week should I do a home leg workout?
Two non-consecutive sessions per week are a reasonable starting point for many beginners. More experienced individuals may tolerate additional sessions depending on their training intensity and recovery. Allow enough time for your muscles to recover, especially when starting a new routine.
3. What is the best lower body exercise for beginners?
Bodyweight squats and chair sit-to-stands are useful starting options because they train everyday movement patterns and can be adjusted easily. Glute bridges and supported calf raises are also accessible choices. The most suitable exercise depends on your mobility, balance, comfort, and current fitness level.
4. Can I do lower body exercises at home without equipment?
Absolutely. Many effective exercises, including squats, reverse lunges, glute bridges, split squats, and calf raises, use body weight alone. A stable chair or wall can provide support when needed, but you do not need gym machines to begin exercising.
5. How long does a lower body workout at home need to be?
A session lasting 15–30 minutes can be enough to complete several well-chosen exercises. Your needs will depend on the number of sets, rest periods, exercise difficulty, and fitness goals. A shorter routine performed consistently may be more practical than an ambitious plan you struggle to maintain.
6. Can these exercises help improve the appearance of my legs and glutes?
Consistent strength training can support muscle development, which may gradually influence muscle size and appearance. However, results vary with genetics, training progression, nutrition, and other individual factors. Exercises cannot selectively remove fat from the thighs, hips, or another specific body area.
7. Should I feel sore after every leg workout?
No. Muscle soreness is not a requirement for progress. You may experience mild soreness when trying unfamiliar exercises, but improvements can occur without noticeable soreness after each session. Severe pain, marked swelling, or difficulty walking should not be treated as signs of a successful workout.
8. Can older adults do a lower body workout at home?
Many older adults can benefit from appropriately adapted lower body strengthening exercises. Chair sit-to-stands, supported calf raises, and gentle glute bridges may be suitable options. Anyone with significant balance problems, recent falls, chronic pain, or medical restrictions should seek guidance from a healthcare professional or qualified exercise professional before starting.
9. Should I do cardio or strength training first?
If your main goal is lower body strength, you can generally begin with a brief warm-up and then perform your strength exercises. Longer or more intense cardio can be scheduled separately or adjusted so it does not leave you too fatigued to maintain good technique.
10. When should I seek medical advice before exercising?
Speak with a healthcare professional before beginning a new program if you have a condition that limits physical activity, recent surgery, significant joint or back problems, or specific exercise restrictions. Stop exercising and seek appropriate medical attention if you develop chest pain, faintness, unusual severe breathlessness, or sudden significant pain.
Conclusion: Build a Consistent Lower Body Workout at Home
Strengthening your legs and glutes does not require an elaborate gym setup. With bodyweight squats, reverse lunges, glute bridges, calf raises, and other practical movements, you can create a useful lower body workout at home that fits your schedule and available space.
Start with exercises you can perform comfortably, prioritize good technique, and increase the difficulty gradually. You can begin with a short session twice a week and adjust your routine as your strength, confidence, and recovery improve.
Most importantly, choose a routine you can maintain. Consistent practice, appropriate rest, balanced nutrition, and realistic expectations are more valuable than attempting an exhausting workout every day.
If an exercise causes pain or conflicts with a medical restriction, modify it or seek professional advice. Your goal is to build strength safely and sustainably, one session at a time.